How To Clean Inkjet Printer Heads?
To clean inkjet printer heads, use your printer’s automatic cleaning utility found in the maintenance settings, or manually clean them with distilled water and lint-free cloths.
Most inkjet printer head cleaning can be done through built-in software tools, but stubborn clogs may need gentle manual cleaning with proper supplies.
Why Your Inkjet Printer Heads Get Clogged
Think of your inkjet printer head like a tiny shower head with hundreds of microscopic holes. When you don’t use your printer regularly, ink dries up and blocks these tiny openings. This creates those annoying streaky prints or missing colors that make you want to throw your printer out the window.
Dust, paper particles, and dried ink are the main culprits behind clogged printer heads. Even high-quality printers suffer from this problem. The good news? You can fix it yourself in most cases.
Signs Your Printer Heads Need Cleaning
Your printer will tell you when it needs help. Here are the warning signs you shouldn’t ignore:
- Streaky or faded printouts
- Missing lines in text or images
- Colors printing incorrectly or not at all
- White lines running through printed pages
- Blurry or smudged text
If any of these sound familiar, your printer heads probably need attention. Don’t wait too long to address these issues. The longer you wait, the harder the cleaning becomes.
Automatic Cleaning Methods
Start with the easy option first. Every inkjet printer comes with built-in cleaning tools. These automated systems can solve most clogging problems without getting your hands dirty.
Using Windows Built-in Cleaning Tools
Windows makes printer maintenance pretty straightforward. Go to your Control Panel and find “Devices and Printers.” Right-click on your printer and select “Printing Preferences” or “Printer Properties.”
Look for a “Maintenance” or “Utility” tab. You’ll find options like “Clean Print Heads” or “Head Cleaning.” Click this option and let your printer do the work. The process usually takes 2-3 minutes.
Using Mac Cleaning Utilities
Mac users can access cleaning tools through System Preferences. Click on “Printers & Scanners,” select your printer, and click “Options & Supplies.” Look for maintenance or utility options in the menu.
Some Mac systems show these options under “Utility” when you click your printer’s icon in the dock during printing.
Manufacturer-Specific Software
Most printer brands offer their own cleaning software. Canon has the IJ Printer Utility. HP provides HP Smart. Epson offers Epson Connect Printer Setup Utility.
These brand-specific tools often work better than generic options. They’re designed specifically for your printer model and can run deeper cleaning cycles.
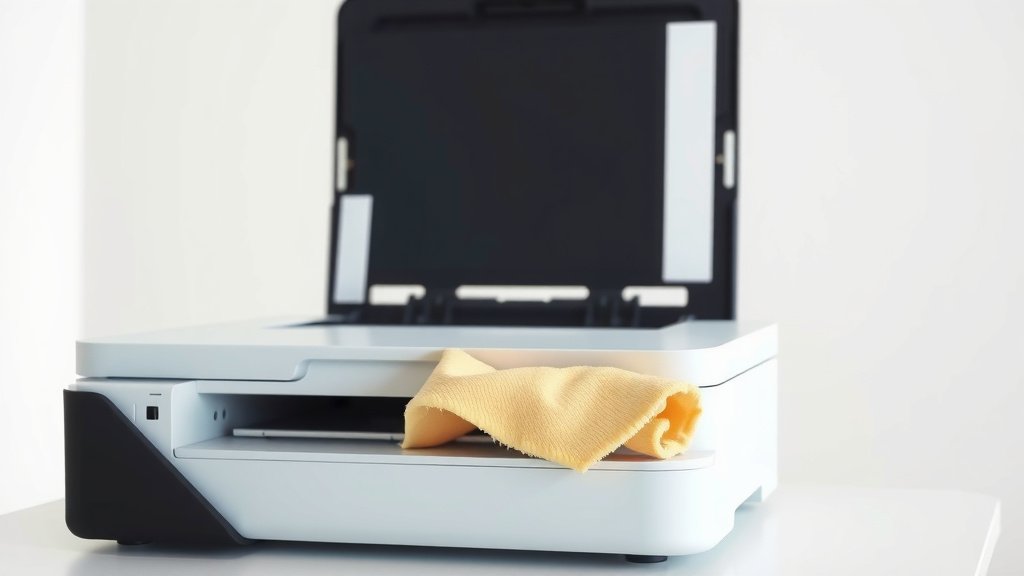
Manual Cleaning Techniques
When automatic cleaning doesn’t work, you’ll need to get hands-on. Don’t worry – it’s easier than you think. Just take your time and be gentle.
Gathering Your Cleaning Supplies
Before you start, collect these items:
- Distilled water (never use tap water)
- Lint-free cloths or coffee filters
- Cotton swabs
- Small shallow dish
- Rubber gloves (optional but recommended)
Avoid using alcohol, acetone, or any cleaning chemicals. These can damage your printer permanently. Distilled water works best because it won’t leave mineral deposits.
Removing the Print Head Safely
First, turn off your printer and unplug it. Safety comes first. Open your printer cover and let the print head move to the center position. Some printers do this automatically when you open the cover.
Gently lift the ink cartridges out of their slots. The print head might be attached to the cartridges or be a separate component underneath. Check your printer manual if you’re not sure which type you have.
For Removable Print Heads
If your print head comes out separately, lift it straight up. Don’t twist or force it. These components are delicate and expensive to replace.
For Built-in Print Heads
Some printers have print heads built into the cartridges. In this case, you’ll clean the cartridge contacts and the printer’s contact points.
The Gentle Cleaning Process
Pour a small amount of distilled water into your shallow dish. Dip a cotton swab in the water and gently dab the print head nozzles. Don’t rub or scrub – just light dabbing motions.
For stubborn clogs, place the print head face-down in the dish with just enough water to cover the nozzles. Let it soak for 10-15 minutes. This gives the water time to dissolve dried ink.
Drying and Testing
After cleaning, gently pat the print head dry with a lint-free cloth. Let it air dry for at least 10 minutes before reinstalling. Moisture and electronics don’t mix well.
Reinstall everything in reverse order. Put the print head back, insert your cartridges, and close the printer cover. Run a test print to see if the cleaning worked.
Deep Cleaning for Stubborn Clogs
Sometimes regular cleaning isn’t enough. When you’re dealing with really stubborn clogs, you need stronger methods.
Extended Soaking Method
For print heads that haven’t been used in months, try extended soaking. Place the print head in distilled water overnight. This gives the water plenty of time to break down hardened ink deposits.
Some people add a tiny drop of dish soap to the water. Research from printer repair specialists suggests this can help break down stubborn ink residue. Use just one drop in a small dish of water.
Warm Water Technique
Slightly warm distilled water can be more effective than cold water. Heat the water to about body temperature – not hot, just warm to the touch. Hot water can damage delicate print head components.
The Paper Towel Method
Place a damp paper towel on a flat surface. Set the print head face-down on the towel for several hours. The constant moisture helps dissolve dried ink gradually.
Cleaning Different Printer Brands
Each printer brand has slightly different cleaning procedures. Here’s what I found works best for major manufacturers:
| Brand | Best Method | Special Notes |
|---|---|---|
| Canon | Built-in utility first | Print heads usually removable |
| HP | HP Smart software | Many models have built-in heads |
| Epson | Head cleaning utility | Known for effective auto-cleaning |
| Brother | Manual cleaning often needed | Print heads typically removable |
Canon-Specific Tips
Canon printers often respond well to their built-in cleaning cycles. Run the standard cleaning first, then try the deep cleaning option if needed. Canon print heads are usually easy to remove for manual cleaning.
HP Printer Considerations
Many HP printers have the print head built into the cartridge. This means replacing old cartridges often solves print quality issues. If you’re using refilled cartridges, manual cleaning becomes more important.
Epson Maintenance
Epson printers are known for having excellent built-in cleaning systems. Try running 2-3 automatic cleaning cycles before attempting manual cleaning. Epson heads can be sensitive to manual handling.
Prevention Tips to Avoid Future Clogs
An ounce of prevention beats a pound of cure. Here’s how to keep your printer heads clean longer:
Regular Printing Schedule
Print something at least once a week. This keeps ink flowing through the nozzles and prevents drying. Even printing a simple test page helps maintain your printer.
Many experts recommend setting a weekly reminder on your phone. Print a photo, document, or even just a test page to exercise your printer.
Proper Shutdown Procedures
Always turn your printer off using the power button, not by unplugging it. This allows the printer to park the print head in a sealed position, preventing ink from drying out.
Storage Environment Matters
Keep your printer in a room with stable temperature and humidity. Extreme heat or cold can affect ink consistency and cause more clogs.
Quality Ink Choices
While generic ink costs less, it can cause more clogs than original manufacturer ink. The consistency and chemical composition of cheap ink varies more, leading to print head problems.
If you use third-party ink, choose reputable brands with good reviews. The money you save on ink might cost you more in printer maintenance.
When to Replace Instead of Clean
Sometimes cleaning isn’t worth the effort. Here are signs you should replace your print head or entire printer:
- Multiple cleaning attempts show no improvement
- Print head has visible physical damage
- Replacement print head costs more than 60% of a new printer
- Your printer is over 5 years old with ongoing problems
I’ve found that print heads lasting 2-3 years with regular use is normal. Heavy users might see shorter lifespans, while occasional users can get 4-5 years from quality print heads.
Troubleshooting Common Cleaning Problems
Cleaning Made Things Worse
If your prints look worse after cleaning, don’t panic. Run 2-3 more cleaning cycles to clear any loosened debris. Sometimes cleaning dislodges particles that need additional cycles to flush out.
Only Some Colors Work
When specific colors don’t print, those particular nozzles are clogged. Focus your manual cleaning on those sections of the print head. You might need longer soaking times for stubborn single-color clogs.
Cleaning Cycles Use Too Much Ink
Automatic cleaning cycles do use ink, but it’s necessary maintenance. Think of it like changing your car’s oil – it costs something now to prevent bigger problems later.
Cost-Effective Cleaning Solutions
Professional printer cleaning can cost $50-100. Learning to clean print heads yourself saves money and teaches you valuable maintenance skills.
The supplies for manual cleaning cost under $10 and last for many cleaning sessions. Compare that to service calls or new print heads costing $30-80.
Conclusion
Cleaning inkjet printer heads doesn’t have to be scary or complicated. Start with automatic cleaning utilities, and move to manual cleaning if needed. Regular maintenance prevents most problems and keeps your printer running smoothly for years.
Remember to print regularly, use quality ink, and clean gently when problems arise. With these techniques, you can solve most print quality issues yourself and avoid expensive repairs or replacements.
Can I use tap water to clean printer heads?
No, always use distilled water. Tap water contains minerals that can leave deposits and cause more clogs in your printer heads.
How often should I clean my printer heads?
Only clean when you notice print quality problems. Unnecessary cleaning wastes ink and can wear out components faster than normal use.
Is it safe to leave the print head soaking overnight?
Yes, extended soaking in distilled water is safe for most print heads. Just make sure they’re completely dry before reinstalling them in your printer.
Why do my prints still look bad after cleaning?
Sometimes loosened debris needs multiple cleaning cycles to clear completely. Try running 2-3 automatic cleaning cycles after manual cleaning, or the print head may need replacement.
Can I prevent printer head clogs completely?
You can’t prevent them entirely, but regular weekly printing, proper shutdown procedures, and using quality ink can significantly reduce clog frequency and severity.