
How to Clean the Print Head on a Canon Printer?
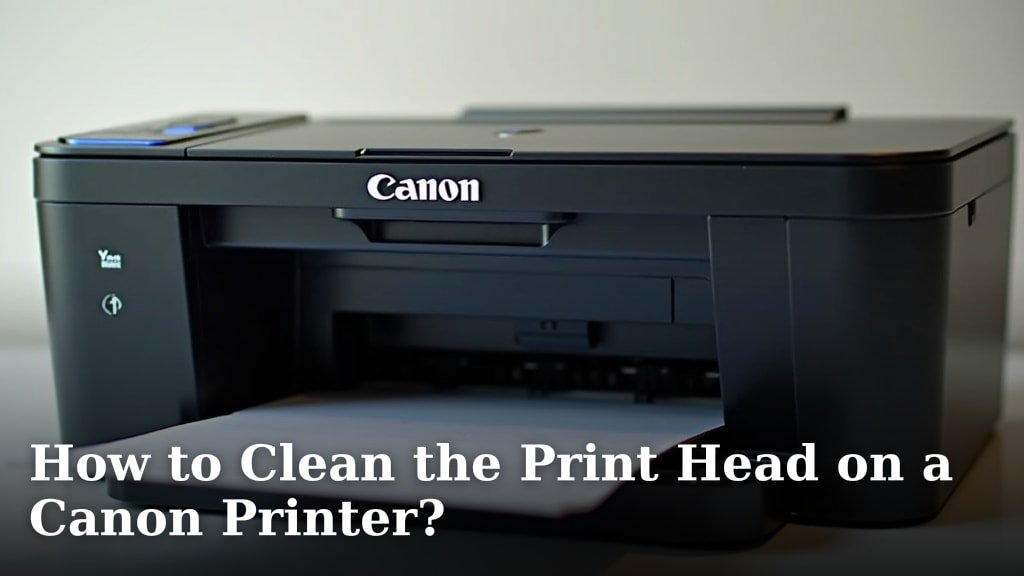
The easiest way to clean the print head on your Canon printer is by using the built-in cleaning utility. This software function helps resolve common issues like faded colors or streaks in your prints. You don’t always need to physically touch the print head to get great results.
When your Canon printer isn’t printing clearly, it often means the nozzles on the print head are clogged. This is especially common if you don’t use your printer very often. Luckily, most Canon printers have an easy automatic cleaning cycle that can fix this. It’s a smart first step before trying anything more involved.
- Use your printer’s built-in cleaning utility.
- This software tool helps fix faded colors and streaks.
- It’s usually the easiest way to resolve printing problems.
- Run a test print afterward to check the quality.
Let’s walk through exactly how to run that cleaning cycle and get your Canon printer back to producing crisp, clear pages.
“`htmlKeeping Your Canon Printer’s Print Head Clean
When your Canon printer starts acting up, printing faded pages or strange lines, it’s often a sign that the print head needs a little attention. Think of your print head as the tiny painter inside your printer, carefully placing ink dots on the paper. If its brushes (the nozzles) get clogged, the picture won’t look so good.
Fortunately, Canon printers are designed with this in mind. They have built-in cleaning functions that can usually fix these issues without you having to get your hands dirty. We’ll guide you through the easiest ways to get your printer back to producing crisp, vibrant prints.
Understanding Print Head Cleaning
A printer’s print head is a complex piece of technology. It contains thousands of microscopic nozzles. These nozzles spray tiny droplets of ink onto the paper to create your documents and photos. Over time, ink can dry up or dust can accumulate, blocking these delicate nozzles.
This blockage is the most common reason for poor print quality. You might see faint lines, missing colors, or overall dull images. If you don’t print often, dried ink is a particular culprit. It’s like leaving a paint brush out to dry – it becomes stiff and unusable.
Why Regular Cleaning is a Good Idea
Running a cleaning cycle periodically can prevent future problems. It keeps the ink flowing smoothly and ensures your printer is always ready when you need it. Think of it as a quick tune-up for your printer’s artistic capabilities. Many experts suggest running a cleaning cycle if you notice a slight dip in print quality or if the printer hasn’t been used for a few weeks (HP Support). It’s a simple step that can save you from bigger headaches later.
Running the Automatic Cleaning Cycle
Most Canon printers offer an automatic cleaning cycle through their software. This is almost always the first and easiest step you should take. It’s designed to force ink through the nozzles, clearing out any minor clogs. You can usually access this feature from your computer.
Cleaning from Your Computer (Windows)
This process can vary slightly depending on your specific Canon model, but the general steps are consistent. You’ll typically start by accessing your printer’s properties or preferences.
- Open Printer Properties: Click the Start menu, then go to “Devices and Printers” or “Printers & Scanners.” Find your Canon printer, right-click on it, and select “Printer properties.”
- Navigate to Maintenance: Look for a tab labeled “Maintenance,” “Utility,” or “Services.”
- Select Print Head Cleaning: Within the maintenance tab, you should find an option for “Cleaning” or “Print Head Cleaning.” Click on it.
- Choose Cleaning Type: You might be offered different levels of cleaning, like “Standard” or “Deep Cleaning.” Start with the standard clean. A deep clean uses more ink and takes longer.
- Start the Cycle: Follow the on-screen prompts to begin the cleaning process. Your printer will likely make some noise as it works.
- Print a Test Page: After the cleaning is complete, it’s crucial to print a test page or a nozzle check pattern. This shows you if the cleaning was successful. You can usually print this directly from the same maintenance window.
If the first cleaning doesn’t fully resolve the issue, you can try running the cleaning cycle one or two more times. However, research suggests that running the cleaning cycle more than 3-4 times in a row can excessively use ink and potentially harm the print head (Canon Support). If you still see problems after a few attempts, it’s best to let the printer rest for a bit or try another method.
Cleaning from Your Computer (macOS)
The steps on a Mac are quite similar. You’ll be working within your printer’s settings panel.
- Access System Preferences: Click the Apple menu, then choose “System Preferences” (or “System Settings” on newer macOS versions).
- Go to Printers & Scanners: Select “Printers & Scanners.”
- Select Your Printer: Click on your Canon printer from the list on the left.
- Find Printing Options: Look for a button like “Options & Supplies” or “Print Options.”
- Locate Maintenance: In the new window, find the “Utility” or “Maintenance” tab.
- Run Cleaning: Select the “Print Head Cleaning” option and follow the instructions.
- Perform a Test Print: Just like on Windows, print a nozzle check pattern or a test page afterward to see the results.
Again, if the first cleaning isn’t perfect, try running it again once or twice. If the problem persists, don’t keep running the cleaning cycle endlessly. It’s counterproductive and uses a lot of ink.
Cleaning Directly from the Printer Panel
Some Canon models allow you to initiate a cleaning cycle directly from the printer’s control panel, which is handy if your computer isn’t nearby or having issues. This is often a convenient alternative.
- Access the Setup Menu: Navigate through your printer’s LCD screen or control panel buttons. Look for a “Setup,” “Settings,” or “Maintenance” menu.
- Find Cleaning Options: Within the setup menu, locate the “Print Head Cleaning” or “Nozzle Cleaning” option.
- Start the Process: Select the cleaning option and confirm. The printer will then perform the cycle.
- Print a Test: After the cycle finishes, make sure to print a nozzle check pattern from the printer’s own menu to verify the fix.
This method bypasses the computer entirely, making it a quick way to troubleshoot. Always follow up with a test print to confirm improvement. You’ll see the results right away.
When Automatic Cleaning Isn’t Enough
If you’ve run the automatic cleaning cycle a few times and your prints still look fuzzy or have streaks, it might be time for a slightly more involved approach. Sometimes, a deeper cleaning is required.
Performing a Deep Cleaning Cycle
Most Canon printers have a “Deep Cleaning” or “Power Cleaning” option. This is a more intensive cycle that uses more ink and runs for a longer time. It’s designed to tackle stubborn clogs that a standard cleaning might miss.
You’ll usually find this option in the same “Maintenance” or “Utility” tab on your computer software or printer control panel as the standard cleaning. Be aware that running a deep clean uses a significant amount of ink. It’s recommended to use this only when necessary, not as routine maintenance.
After initiating a deep clean, it’s even more important to print a nozzle check pattern. This will clearly show if the deeper cleaning has resolved the issue. If it has, great! If not, don’t run deep cleaning multiple times in a row. Let your printer rest, as excessive cleaning can be detrimental.
Manual Cleaning: A Closer Look (Use with Caution!)
In some cases, particularly with older printers or severe clogs, a manual cleaning might be considered. This involves physically interacting with the print head. We generally advise against this unless you’re comfortable with printer hardware. It carries a risk of damaging the print head if not done carefully.
If you do decide to try manual cleaning, you’ll typically need to access the print head carriage. This usually involves turning on the printer and, as soon as it starts moving to its home position, unplugging it from the power source. This allows you to manually slide the carriage. (Source: Printer manufacturer documentation often details this for specific models).
Once you can access the print head, you would typically use a lint-free cloth or swab lightly dampened with distilled water or a specific print head cleaning solution. Gently wipe the bottom of the print head and the nozzles. Never use excessive force, and ensure the print head is completely dry before re-powering the printer.
Important Note: Manual cleaning is often a last resort. Many modern printers have integrated print heads that are difficult or impossible to access for manual cleaning. Always consult your printer’s manual first. If your manual doesn’t cover it, it’s likely not recommended by the manufacturer.
Troubleshooting Persistent Issues
What if even deep cleaning and manual wiping don’t bring back perfect prints? It’s frustrating, we know! Several factors can still be at play.
Ink Cartridge Check
Sometimes, the problem isn’t a clogged print head at all. It could be the ink cartridges themselves. Ensure they are properly installed and that the contacts are clean. If you’re using third-party ink, sometimes compatibility issues can arise.
Try removing and reinserting the ink cartridges. If you have spare cartridges, especially genuine Canon ones, try swapping them out. A faulty ink cartridge can mimic the symptoms of a clogged print head. This is a surprisingly common cause of poor print quality.
Printer Driver Issues
Outdated or corrupted printer drivers can cause all sorts of printing anomalies. Drivers are the software that allows your computer to communicate with your printer. If they’re not working correctly, the printer might not receive instructions properly.
Consider reinstalling your printer drivers. You can usually find the latest drivers on the official Canon support website for your specific printer model. Downloading and installing fresh drivers can sometimes resolve mysterious printing problems.
When to Call a Professional or Replace
If you’ve tried all the above steps—automatic cleaning, deep cleaning, checking cartridges, and updating drivers—and your prints are still unsatisfactory, it might be time to consider other options. It’s possible that the print head is permanently damaged or nearing the end of its lifespan.
For some models, a print head can be a replaceable part, but this can be expensive. Often, for consumer-grade printers, the cost of professional repair or a replacement print head exceeds the cost of a new printer. If your printer is older or was an inexpensive model, it might be more economical to invest in a new one.
Here’s a quick checklist to follow:
- Run standard print head cleaning.
- Print a nozzle check pattern.
- If needed, run deep cleaning once.
- Print another nozzle check.
- Check ink cartridge installation.
- Consider driver updates if issues persist.
By following these steps, you’ll give your Canon printer the best chance to get back to producing the quality prints you expect. Happy printing!
“`Conclusion
You’ve learned that keeping your Canon printer’s print head clean is key to vibrant, clear prints. Most issues can be solved with the printer’s built-in cleaning utility, accessible from your computer or the printer panel itself. Remember to start with a standard clean and print a test page. If problems persist, a deep clean or a check of your ink cartridges and drivers might be necessary. For persistent issues, consider professional help or a new printer if repairs aren’t cost-effective. Your next step is to try running the standard cleaning cycle to refresh your printer’s performance!
Frequently Asked Questions
How often should I run a print head cleaning cycle?
You don’t need to run a cleaning cycle every time you print. It’s best to use it only when you notice a decline in print quality, such as streaks or faded colors. Running it too often can waste ink.
Can I use regular tap water to clean my Canon print head?
No, never use tap water for manual cleaning. Tap water contains minerals that can leave residue and cause further clogs. Distilled water or a specialized print head cleaning solution is recommended for manual cleaning.
Will cleaning my print head void my Canon printer’s warranty?
Generally, using the built-in cleaning utility won’t void your warranty. However, attempting manual cleaning and potentially causing damage could affect it. Always consult your printer’s manual or Canon support for specific warranty information.
What does a nozzle check pattern tell me?
A nozzle check pattern is a diagnostic printout that shows the status of all the tiny nozzles on your print head. It will clearly display any missing lines or gaps, indicating which nozzles might be clogged and confirming if a cleaning cycle was successful.
My printer still isn’t printing correctly after cleaning. What else could be wrong?
If cleaning cycles, deep cleaning, and checking cartridges don’t help, the issue might be with the printer drivers or the print head itself could be physically damaged or at the end of its life. Reinstalling drivers is a good next step before considering replacement.
