How to Use Cricut Explore Air 2
To use a Cricut Explore Air 2, connect it by Bluetooth, sign in to Design Space, load material on the right mat, set the dial, and press Cut. Start with a simple cardstock or vinyl design, follow the prompts, and weed the result before removing it.
On this page (12 sections)
- What is a Cricut Explore Air 2 and what can it do?
- How to use Cricut Explore Air 2 for the first time
- How does Design Space work for beginners?
- What materials can the Explore Air 2 cut?
- How do you load material and set the dial?
- How do you run your first cut step by step?
- What blade do you use for cutting vinyl?
- Can you add foil to Explore Air 2 projects?
- Should you buy a bundle or stick with the machine?
- How do you troubleshoot common Explore Air 2 problems?
- How do you care for mats, blades, and the machine?
- How to use Cricut Explore Air 2 well after week one
To use a Cricut Explore Air 2, connect it by Bluetooth, sign in to Design Space, load material on the right mat, set the dial, and press Cut.
Design Space holds your design, the mat holds material flat, and the machine cuts or draws what the software sends. A good setup takes a few minutes and saves wasted material.
What is a Cricut Explore Air 2 and what can it do?
A Cricut Explore Air 2 is a 12-inch electronic cutting machine for paper, vinyl, and iron-on projects. For a smaller-format alternative, compare Cricut Maker and Joy.
It cuts decals, stickers, cards, labels, stencils, and apparel graphics. With the right tool, it can also score, draw, and add foil detail across more than 100 materials.
If you are comparing models, start with our guide to craft cutting machines. The dial sets blade pressure, and a wrong setting causes torn edges or cuts that will not weed.
How to use Cricut Explore Air 2 for the first time
To use the Explore Air 2 for the first time, plug it in, pair it by Bluetooth, open Design Space, and run a test cut.
Place the machine on a flat, sturdy surface with clear space for the mat to move in and out.
Open Design Space, sign in, and follow the prompt to connect. Bluetooth pairing usually appears in the app rather than device settings.
Load the fine-point blade and choose a simple project. A basic shape or starter card lets you learn feeding, cutting, and weeding first.
How do you set up the machine and pair Bluetooth?
Set up power, a flat surface, and Bluetooth pairing before you open a project. The machine must show as connected before you send a job.
Turn the machine on and keep it close to your device. If Bluetooth does not find it, restart the machine and check that Bluetooth is enabled.
Download Design Space fully before you start. A partial install is a common cause of a missing prompt.
Once paired, keep the machine name visible in the app. If it disconnects mid-job, stop and reconnect before you press Cut again.
How does Design Space work for beginners?
Design Space is the free app where you pick, size, and send designs to the machine.
Start with a ready-made project or simple shape. Resize it, check that it fits your material size, and mirror it for iron-on.
Keep letters large for a first cut, as small loops and thin lines are hard to weed and cut cleanly. Save the project before you cut so you can repeat it.
If you print then cut, the machine reads registration marks. That feature is covered in our guide to What Printer Works Best with Cricut Projects?.
What materials can the Explore Air 2 cut?
The Explore Air 2 can cut vinyl, cardstock, iron-on, printable materials, and more than 100 popular materials with the right settings.
Vinyl is a forgiving first choice. It cuts cleanly and weeds easily, and cardstock also works well for cards and simple shapes.
Save iron-on for later, as it needs mirroring and careful weeding.
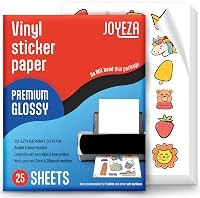
Printable vinyl and printable iron-on let you print at home first, then the machine cuts around the design. That opens full colour stickers and apparel.
Thicker materials need more pressure and sometimes a different tool. Do not force a material the dial does not support.
How do you load material and set the dial?
Load material smooth, flat, and aligned on the correct mat, then set the dial to match that material.
Choose the mat first. Light grip suits thin paper, standard grip suits most vinyl, cardstock, and iron-on, and strong grip suits thick cardstock and backed fabric.
Press material down evenly from the center out.
Turn the dial to the material name. If between settings, start lower and test.
Too deep can damage the mat, and too shallow will not separate.
Insert the mat until the rollers grab it straight. If it feeds crooked, unload and reload, as crooked loading causes off-center cuts.
Which mat should you use for vinyl, cardstock, and iron-on?
Use standard grip for most vinyl and cardstock, light grip for thin papers, and strong grip for thick stock. The WORKLION 3-pack below gives you all three grips in 12 x 24 inches.
The set includes one mat at each grip level. Standard grip covers cardstock, printable paper, iron-on, vinyl, and washi.
Strong grip suits thick cardstock, faux leather, and poster board. Light grip suits light cardstock, office paper, vellum, and other light materials.
Keep the clear cover on mats when you store them. It keeps dust and scraps off the adhesive.
Use a scraper to clear small pieces and a spatula to lift shapes without bending them.
How do you run your first cut step by step?
Run your first cut by sending the design, loading the mat, pressing Cut, and unloading only when the machine stops.
Place the mat in the machine and press the flashing Cut button. Do not pull the mat out early, as that can shift material and ruin fine lines.
When prompted, press unload and slide the mat out. Flip it over and peel the mat away from the material to reduce curling.
Weed vinyl with a hook or tweezers from a corner, keeping backing flat. For cardstock, remove the cut piece with a spatula.
What blade do you use for cutting vinyl?
For vinyl, use the fine-point blade with the dial set to vinyl.
Keep the blade clean and seated fully in the clamp. Stuck vinyl can score the next cut, so check for debris before you raise pressure.
Our guide on what blade to use for cutting vinyl covers blade types and when to change them.
Test a small circle or letter before a full design. If it tears, lower the setting and test again on a fresh area.
Can you add foil to Explore Air 2 projects?
Yes, with the Cricut Foil Transfer Kit, which works with Cricut Maker and Explore machines. It adds a pressure-activated foil detail without heat.
The kit includes 12 foil transfer sheets in gold and silver, each 4 x 6 inches, with 6 of each color. It also includes 3 interchangeable tips in fine, medium, and bold, plus a tool housing and tape.
Swap the tip based on line weight. Fine suits small lines, medium suits most card details, and bold suits larger areas.
Follow the Design Space prompts, let the machine finish, then peel to reveal the foil.
Foil works best on smooth cardstock. Test on the same cardstock you plan to use, and keep the sheet taped flat until the machine stops.
Should you buy a bundle or stick with the machine?
Buy a bundle only if it includes materials and tools you will use in the first month.
Our best cricut explore bundle guide compares bundle contents side by side. That helps you avoid paying for tools you already own.
The Cricut Explore 5 Essential Bundle below is not the Air 2. Treat it as a comparison point rather than a direct add-on.
The bundle includes Smart Vinyl, Smart Iron-On, Value Cardstock, Insert Card Sets, and Printable Vinyl. It also includes 25 premium images and 1 font, with supplies for 65 projects.
The machine cuts 100+ materials and works with six tools.
If you already own an Air 2, focus your next purchase on mats, blades, and material. Those consumables affect every project.
How do you troubleshoot common Explore Air 2 problems?
Fix most problems by checking mat grip, blade seating, dial setting, and Bluetooth connection first.
If material slips, the mat may be dirty or the grip too light. Clean it, cover it when stored, and move up one grip level.
If material will not release, grip may be too strong or the cut too deep. If cuts are shallow, raise the dial one step and test.
If cuts tear, lower it. Change one variable at a time.
If Design Space will not find the machine, restart Bluetooth on both devices and reopen the app. Check that the mat is loaded straight and the material size in the app matches the mat.
For model questions, our cricut explore vs explore air and cricut explore air vs air 2 guides break down the differences. For a newer workflow, how to use cricut explore 3 covers the next steps.
How do you care for mats, blades, and the machine?
Care for the machine by keeping mats covered, blades clean, and the rollers clear of debris.
Store mats with the clear cover on. Covering them keeps dust off the adhesive and preserves grip.
When a mat loses grip, hand wash it gently if allowed, let it dry fully, and test again.
Wipe the blade housing with a dry cloth and check for stuck vinyl. Replace a blade when cuts turn rough despite correct settings, as a dull blade tears fine detail first.
Keep rollers free of paper scraps with a soft brush. Avoid spraying cleaners directly into the machine.
How to use Cricut Explore Air 2 well after week one
To keep using the Explore Air 2 well, save the settings that work for each material and repeat them.
Record mat grip, dial setting, blade, and material brand for each successful cut. When you buy a new material, run a small test and update the note.
That habit turns setup into a two-minute task.
Start with projects you can finish in one sitting, such as cards, labels, and simple decals. Add foil and layered designs once basic cutting feels routine.
If you want a smaller machine for labels, our cricut joy xtra reviews cover that option. For a full overview, return to craft cutting machines and compare size, tools, and material needs.
Frequently asked questions
What is a Cricut Explore Air 2?
A Cricut Explore Air 2 is a 12-inch electronic cutting machine that cuts vinyl, cardstock, iron-on, and more than 100 materials. You control it from Design Space on a computer or mobile device, and it can also write, draw, score, and foil with the right tools.
What can a Cricut Explore Air 2 do?
It can cut decals, stickers, cards, apparel graphics, stencils, and paper crafts, plus score fold lines and draw with pens. Its cutting width is 12 inches, and material choice depends on the blade, mat, and tool you load for each job.
How do I choose the right mat for the Explore Air 2?
Match mat grip to material weight. Use light grip for thin paper and vellum, standard grip for cardstock, vinyl, and iron-on, and strong grip for thick cardstock, faux leather, and fabric with backing.
Replace a mat when material slips or won't release cleanly.
What blade should I use for cutting vinyl?
Use the fine-point blade in standard grip mode for most vinyl cutting jobs. Keep the blade clean, set the dial to vinyl, and test a small shape first.
Our guide on what blade to use for cutting vinyl explains when to switch tools.