How to Use Cricut Maker 3
To use a Cricut Maker 3, connect it in Design Space, load the right tool and material, and follow the on-screen prompts to cut. Choose the tool for the job, check the material setting, and unload carefully before weeding or applying.
On this page (10 sections)
- What is the Cricut Maker 3 and what can it do?
- How do you set up the Cricut Maker 3 for the first time?
- How does Design Space guide a Maker 3 cut?
- What tools do you need for common Maker 3 projects?
- How do you cut vinyl and iron-on with Maker 3?
- How do you cut cardstock, paper and stickers?
- What routine care keeps Maker 3 cutting well?
- Should you buy Maker 3 or a newer Maker model?
- What mistakes should new Maker 3 owners avoid?
- How do you plan your first week of Maker 3 projects?
To use a Cricut Maker 3, connect it in Design Space, load the right tool and material, and follow the on-screen prompts to cut. The Cricut Maker 3 is a smart cutting machine for DIY projects such as vinyl decals, iron-on designs, cards and stickers.
You do not need design experience to start. Design Space walks you through tool checks, material choice and unloading.
Keep your first project simple, then add tools such as foil transfer once cutting is familiar.
What is the Cricut Maker 3 and what can it do?
The Cricut Maker 3 is the third-generation Maker smart cutting machine in the Cricut family. It cuts, draws, foils, scores, engraves, debosses and perforates, depending on the tool you fit.
It works with 300+ materials, including vinyl, iron-on, cardstock, paper and fabric. The exact list depends on the tool in the clamp and the material setting you pick.
Always match the tool, material and setting before you press cut.
Our guide to craft cutting machines helps you place Maker 3 in the wider market. Maker machines suit owners who want tool variety rather than only basic vinyl cutting.
What is Cricut Maker 3, in plain terms?
Think of the Maker 3 as a computer-controlled cutter that swaps tools in one clamp. One tool cuts, another draws with a pen, and another presses foil into a surface.
That tool swapping is central to how to use Cricut Maker 3 well. You plan a project around the finish you want, then pick the tool that creates it.
How do you set up the Cricut Maker 3 for the first time?
Set up begins with power, a stable table and the Design Space app on a compatible device. Follow the prompts to register the machine, load the fine-point blade and run a test cut.
Place the machine on a flat surface with room for vinyl or mats to move in and out. Keep paper, tools and drinks clear of the moving parts.
Download Design Space, sign in and pair the machine by Bluetooth as the app directs. If the machine does not appear, restart the app and the machine, then check that Bluetooth is on.
Run calibration only if the app asks for it. Calibration helps the machine place cuts and draws in the right spot.
How does Design Space guide a Maker 3 cut?
Design Space is the control centre for design, material choice and cutting. You add shapes, text and images, size them to your blank, then select the material and tool.
The free library includes 3,000+ images and 100+ fonts, according to Cricut. The wider library grows to 1,500,000+ images, 1,000+ fonts and 100,000+ projects with an optional paid Cricut Access subscription.
To start a project, open a new canvas and add a shape or image. Size it with the corner handle so proportions stay true.
Mirror the design if you plan to cut iron-on with the shiny side down.
Send the design to cut, then choose the material from the list. The app sets blade depth and pressure for that material.
What tools do you need for common Maker 3 projects?
Pick the tool by the finish, not by habit. A fine-point blade cuts vinyl, paper and cardstock.
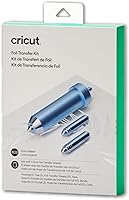
A pen draws lines and lettering. Foil transfer tools add metallic detail through pressure, without heat.
The Cricut Foil Transfer Kit in our bundle guide shows how add-on tools extend a Maker. It includes 3 interchangeable tips in fine, medium and bold sizes, plus a tool housing and tape.
For routine cutting, the fine-point blade does most work. Keep the blade housing clean and check the tip for nicks before a detailed job.
A dull tip tears fine lines.
A weeder lifts small vinyl pieces, and a scraper smooths transfer tape. Pens and scoring tools suit cards with written detail or fold lines.
How do you load tools and materials safely?
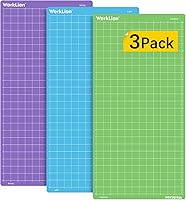
Load the tool into the correct clamp until it clicks, then close the clamp firmly. Load the mat aligned with the guides, with the sticky side facing up for mats.
Keep fingers clear of the blade path when the machine moves. Lift the mat out flat after the cut ends, then peel the mat away from the material.
How do you cut vinyl and iron-on with Maker 3?
Vinyl and iron-on use the same Design Space flow, but mirroring and weeding differ. Vinyl decals sit on the surface, while iron-on transfers to fabric with heat.
For vinyl, cut with the fine-point blade and the vinyl setting. Weed the excess, apply transfer tape, then place the design on a clean, dry surface.
For iron-on, mirror the design in Design Space. Place the material shiny side down on the mat, cut, then weed the negative space.
Press using the time and temperature in its instructions.
If edges lift, check blade depth, mat grip and material choice before you change tools. Most small flaws come from a mismatch in that trio.
How do you cut cardstock, paper and stickers?
Cardstock likes a clean blade, a grippy mat and a setting that cuts through without dragging. Use the cardstock setting first, then check a small corner before a full sheet.
For stickers, use Print Then Cut when you need full-colour designs from an inkjet printer. Print the design, place the sheet on the mat, then let the machine cut around the marks.
If you plan many labels, our article on Can You Print Labels without a Label Maker? explains when a printer is enough. It also links to How Much Does a Label Maker Printer Cost? for readers who want a dedicated device.
How do you get clean cuts on small details?
Small details need a sharp tip, light pressure and a mat with enough grip. Choose a material setting close to the actual stock, then make one test cut.
Use weeding carefully on tight curves. Lift at a shallow angle and support the design with one hand.
What routine care keeps Maker 3 cutting well?
Wipe the rails and mat surface, check the blade tip and store mats flat. Dust and paper fibres build up fast in a craft room.
Remove the blade housing before cleaning around the clamp, and keep the tip guarded when idle. Replace a blade tip when it starts to drag or tear.
Keep the machine away from direct sunlight and damp areas. Let the motor rest between long runs of thick material.
Owners often mention that a fresh mat solves more problems than a new blade. Check grip first, because a weak mat lets material shift mid-cut.
Should you buy Maker 3 or a newer Maker model?
Buy Maker 3 if you find it at a good price and want the full Maker tool range. It suits owners who want foil, scoring, engraving and other add-on actions beyond basic cutting.
If you are choosing between generations, read cricut maker vs maker 3 for the upgrade differences.
For the latest model, see cricut maker vs maker 4 and how to use cricut maker 4. Cricut describes Maker 4 as cutting up to 2X faster than the previous model.
A larger option is covered in cricut maker vs venture. Venture suits bigger materials, while Maker 3 suits a desk or craft table.
What mistakes should new Maker 3 owners avoid?
The top mistake is skipping the material check and cutting on the wrong setting. That error dulls blades, tears details and wastes material.
The second mistake is overloading pressure when a cut looks shallow. Change the blade tip, mat or material match first, then adjust pressure in small steps.
The third mistake is rushing the unload. Wait for the machine to stop, then lift the mat flat and peel the mat from the material.
Keep a simple note with tool, material and setting for each project type. That record turns trial and error into a repeatable process.
How do you plan your first week of Maker 3 projects?
Start with one simple cut, then add one new tool each week. Week one can be a vinyl decal or a card blank.
Week two can add a pen line or a score fold.
That pace builds skill without a pile of half-finished projects. Each finished piece teaches a setting and a finish step.
Keep offcuts in labelled boxes by type. Small scraps suit cards, tags and test cuts.
For your next project, use how to use Cricut Maker 3 as a checklist: design, tool, material, cut, unload, finish.
Frequently asked questions
What is a Cricut Maker 3 used for?
A Cricut Maker 3 is a smart cutting machine that cuts, draws, scores, foils and more with compatible tools. Owners use it for vinyl decals, iron-on designs, cards, stickers and other DIY projects through the Design Space app.
What materials can you cut with a Cricut Maker 3?
It works with 300+ materials, including vinyl, iron-on, cardstock, paper and fabric, depending on the tool fitted. Cricut says the Maker family handles thicker and more varied materials than other Cricut machines.
Do I need Design Space to use the Maker 3?
Yes, Design Space is the app that connects to Cricut cutting machines for design, material selection and cutting prompts. It includes a free content library, and an optional paid subscription opens more images, fonts and projects.
What is the difference between Maker 3 and Maker 4?
Maker 4 is the newer model, described by Cricut as cutting up to 2X faster than the previous model. See our cricut maker vs maker 4 comparison and how to use cricut maker 4 guide before you decide which to buy.