How to Use the Canon CanoScan LiDE 400
To use the Canon CanoScan LiDE 400, connect it to your computer with its USB Type-C cable, place an item on the glass, and start with Auto Scan or an EZ button. Review the result, then save it in the format and folder you need.
On this page (8 sections)
- How do you set up the Canon CanoScan LiDE 400?
- How do you place a photo or document on the scanner?
- Which scan control should you use?
- How do you save a scan as an image or PDF?
- What should you do if a scan looks wrong?
- Is the LiDE 400 right for scanning lots of photos?
- How should you choose between the LiDE 300 and LiDE 400?
- What should you remember when using the Canon CanoScan LiDE 400?
To use the Canon CanoScan LiDE 400, connect it to your computer with the included USB Type-C cable, place a document or photo on the glass, and start with Auto Scan or an EZ button. Review the result, choose a file type and save location, then save the scan.
The LiDE 400 is a USB document and photo scanner. Its Auto Scan mode detects what you're scanning, while its EZ buttons give you direct access to common tasks such as PDF scanning.
How do you set up the Canon CanoScan LiDE 400?
Connect the LiDE 400 to your computer with its included USB Type-C cable, then open the scanning software on the computer. The cable carries data and power, so the scanner uses a single connection.
Set the scanner on a level surface near the computer. Keep enough room to open the lid and place papers without bending their corners.
Follow the setup prompts in the software you use. If the scanner doesn't appear, check that the cable is seated at both ends and that the software recognizes the connected device.
How do you place a photo or document on the scanner?
Lift the lid and place one item face down on the glass, aligned with the scanner's reference corner. Keep the item flat and close the lid gently before scanning.
For a photo, check that no other paper or object covers it. For documents, smooth folded corners so the full page lies on the glass.
The LiDE 400 is a flatbed scanner with a standard sheet capacity of 1. Scan pages one at a time, and use the software to combine pages when making a multi-page PDF.
Which scan control should you use?
Auto Scan is the simplest starting point because it detects what you're scanning and chooses settings. Use an EZ button when you want to start a familiar task, such as saving a PDF.
For a first scan, try Auto Scan and check the preview. If the result is cropped, rotated, or too light, adjust the placement or settings before saving another copy.
How do the EZ buttons help?
The built-in EZ buttons provide quick access to common scan tasks, including PDF functions. Choose the PDF button when you want a document file, then follow the software prompts for file name and destination.
The LiDE 400 can save multi-page PDFs that are editable and searchable. Searchable text depends on the software's OCR settings, so check that option if you need to find words inside a saved document.
When should you change scan settings?
Change settings when the Auto Scan result doesn't match your purpose. A photo you plan to enlarge may need a different resolution or file format than a receipt you only need to read.
Canon describes the LiDE 400 as offering 4800 x 4800 dpi resolution and image enhancements such as color restoration and dust removal. Use the available controls in your software to review enhancement choices, and keep an unedited copy if preserving the original appearance matters.
How do you save a scan as an image or PDF?
Choose the file type, file name, and destination before saving. Use an image format for a photo you want to view or share, and PDF for documents or multiple pages.
A clear file name helps you find scans later. Include a subject or date, then save the file in a folder you can back up.
After saving, open the file to confirm it looks right and landed in the expected folder. This quick check can catch a blank scan, an unexpected crop, or a file saved to the wrong location.
Can the LiDE 400 make searchable PDFs?
Yes, it can save multi-page PDFs that are editable and searchable. Choose the PDF workflow and make sure the software's OCR option is enabled where available.
OCR turns text in a scan into text you can search. It works best when the original page is clear and readable, so check the finished file before relying on it for important records.
What should you do if a scan looks wrong?
Check the item's position, the preview, and the selected settings before scanning again. A crooked page often needs to be repositioned on the glass, while a clipped edge may mean the item extends beyond the scan area.
If the scanner isn't detected, reseat the USB cable and reopen the scanning software. For software errors or controls that differ from your version, consult Canon's support materials for the LiDE 400.
For another way to choose a scanner, see our photo scanners buying guide. It can help you compare flatbed models with scanners designed to feed batches of photos.
Is the LiDE 400 right for scanning lots of photos?
The LiDE 400 suits individual photos and documents placed on its glass, while a feeder can save steps for large batches. See photo ADF scanner guide if you regularly scan stacks of prints.
The right choice depends on how many originals you need to digitize and how often.
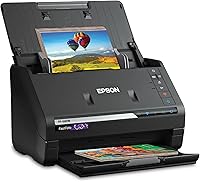
The Epson FastFoto FF-680W is designed for photo batches and can scan up to 36 photos at a time. Its product details also describe capturing an image and handwritten notes on the back of a photo in one scan.
Read our Epson FastFoto FF-680W review for more on that model. If you'd rather compare Epson options, see best Epson photo scanners.
How should you choose between the LiDE 300 and LiDE 400?
Choose the LiDE 400 if you want its 4800 x 4800 dpi resolution, USB Type-C connection, and built-in EZ buttons. The LiDE 300 is another USB flatbed option with Auto Scan mode.
Canon describes the LiDE 300 as a document and image scanner with Auto Scan and PDF functions. Compare the controls and connection details for the model you plan to use, since the two scanners have different features.
For more photo-focused flatbeds, compare our guide to best flatbed scanners for photos. It can help you decide whether a single-item glass bed fits your scanning routine.
What should you remember when using the Canon CanoScan LiDE 400?
When deciding how to use the Canon CanoScan LiDE 400, start with Auto Scan, check the preview, then save the file where you'll find it again. Use the PDF controls for documents and multi-page files, and the image workflow for photos.
The LiDE 400 fits occasional flatbed scanning through a USB connection. For a larger photo backlog, consider the Epson FastFoto; for comparing Canon printers that can print your scans, see Best Canon Printer For Photos and Best Canon Printer For Students.
Frequently asked questions
How do I connect a Canon CanoScan LiDE 400?
Connect the scanner to a computer with the included USB Type-C cable, which carries data and power. Set it on a stable surface, open the scanning software on your computer, and follow its setup prompts.
The scanner uses USB connectivity, so plan to place it near the computer.
What does Auto Scan do on the CanoScan LiDE 400?
Auto Scan detects the item you're scanning and selects settings for it. Place one document or photo on the glass, close the lid, and start Auto Scan in the software.
Check the preview before saving, especially if the item is small or positioned near an edge.
How do I save a scan as a PDF?
Use one of the LiDE 400's built-in PDF buttons or the PDF option in its scanning software, then choose a folder and file name. The scanner can save multi-page PDFs that are editable and searchable.
Check the software's OCR and PDF settings if you need searchable text.
Can the Canon CanoScan LiDE 400 scan photos?
Yes. The LiDE 400 scans documents and photos, and its optical resolution is 4800 x 4800 dpi.
Place photos flat on the glass, keep the lid closed during scanning, and review the result before saving.
For bulk photo batches, consider a scanner built for feeding multiple photos.