How to Use a Photo Scanner with an Automatic Feeder
To use a photo scanner with an automatic feeder, sort and dust prints, load a small aligned stack, and scan with settings suited to your goal. Review the first images before continuing with larger batches.
On this page (9 sections)
- What should you check before feeding photos?
- How do you prepare prints for a photo scanner?
- How should you load photos into an automatic feeder?
- Which settings should you choose for photo batches?
- How can you keep a batch scan organized?
- What should you do if a photo jams or feeds crooked?
- Should old photos go through an automatic feeder?
- How do you check scans before moving on?
- What is the safest way to use a photo scanner with an automatic feeder?
To use a photo scanner with an automatic feeder, prepare clean, flat prints, load a small aligned batch, and choose settings based on how you'll use the scans. Check the first images and originals before feeding the rest.
An automatic document feeder, or ADF, can save time on a stack of compatible prints. Photo-safe feeding matters: damaged, curled, or sticky photos may jam or be harmed, so check the scanner instructions before loading them.
What should you check before feeding photos?
Confirm that your scanner supports photos in the sizes and condition you plan to scan. Its instructions explain how to orient prints, how many to load, and whether a carrier sheet is needed.
An ADF moves each print through a path inside the scanner. A flatbed keeps the photo stationary under a lid, which can be a better fit for fragile originals or prints that don't meet the feeder's requirements.
For office document batches, compare document scanners for home offices.
If you are comparing scanner types, start with this complete guide to the best scanner for pictures. For a quick explanation of the feeder itself, see what an automatic document feeder is.
Check each photo for curled corners, tears, peeling surfaces, tape, or attached scraps. Don't feed a print that is wet, sticky, or stuck to another photo.
Is an ADF different from a photo scanner?
An ADF describes how a scanner feeds pages; it doesn't automatically mean every photo is safe to feed. Some scanners are built to handle photo batches, while others are intended for documents.
Check the manual for photo-specific guidance and supported sizes. If it doesn't clearly say a print is suitable for the feeder, use a flatbed or another safe method.
How do you prepare prints for a photo scanner?
Sort photos by size and condition, then remove loose dust with a clean, soft cloth. Keep damaged or unusual prints separate so they don't get mixed into a routine batch.
Wash and dry your hands before handling prints. Hold them by the edges, and avoid wiping hard or using cleaning liquids unless a qualified conservator or the scanner instructions recommend it.
Separate prints that are stuck together gently. Never pull them apart by force; get advice on handling them if they are old or valuable.
Keep each batch consistent in size and orientation when possible. Remove paper clips, sticky notes, and loose items, and don't put a photo through the feeder if something is attached to it.
How should you load photos into an automatic feeder?
Follow the scanner's markings for face direction and edge alignment, and begin with a small stack. Keep prints straight and fully supported in the input tray.
Don't exceed the feeder's stated capacity. A smaller first batch makes it easier to spot a misfeed, a double feed, or an unexpected scan order.
Before scanning a full collection, test a few prints that are in good condition. Watch the feed and check that the photos exit without catching or bending.
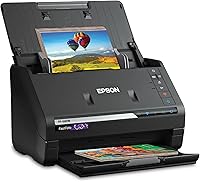
If your scanner includes a carrier sheet, use it only as the instructions direct. The Epson FastFoto FF-680W includes a carrier sheet and is designed for photo batch scanning.
The Epson FastFoto FF-680W also offers settings for sharing, archiving, and enlarging, and can capture handwritten notes on the back of a photo in a single scan. See our Epson FastFoto FF-680W review for more details.
Which settings should you choose for photo batches?
Choose resolution and file type based on what you plan to do with the images. A 300 dpi scan can suit sharing, 600 dpi can suit archiving, and a higher setting can help when you plan to enlarge, if your scanner offers it.
Higher resolution creates larger files and can take longer to scan. Keep an original scan before cropping, rotating, or applying color changes, so you can return to the unedited version later.
Choose a file format your software supports. JPEG files are convenient for sharing, while TIFF is often used for archival image files; the scanner's options may vary.
Use automatic color and orientation features only if they suit your goal. Review a few results first, because automatic enhancement can change faded colors or crop edges differently than you expect.
Should you use the same settings for every photo?
Use one setting for a batch only when the photos have similar needs. A mixed stack of small snapshots, panoramas, postcards, or faded prints may call for separate passes.
Group prints by size and purpose, then name each batch clearly. This makes it easier to find the right files and avoid mixing a high-resolution archive scan with smaller sharing copies.
How can you keep a batch scan organized?
Create a folder for the collection and use a consistent file-naming pattern before you begin. For example, include an event or family name and a sequence number.
Check the software's options for saving scans in order. If the feeder can scan both sides, confirm whether it will capture backs that have handwritten notes.
The Epson FastFoto FF-680W can capture the image and handwritten notes on the back in one scan. It also supports adding voice or text to photos in its app, which can help keep context with family images.
The Canon CanoScan LiDE 300 is a flatbed scanner with USB connectivity and Auto Scan Mode. It suits a workflow where you place individual photos on the glass rather than send a stack through a feeder.
The Canon CanoScan LiDE 400 is another flatbed choice, with Auto Scan Mode and color restore and dust removal features. For more options when scanning many prints, see how to choose the best photo scanner for multiple photos.
What should you do if a photo jams or feeds crooked?
Stop the scan and follow the scanner's instructions for clearing a jam. Don't pull a photo out while the rollers are moving or force a print through the feeder.
Inspect the photo and the feed path after removing it. If the print is bent, torn, or marked, switch to a flatbed for the rest of the collection and check the scanner's care instructions.
If prints repeatedly feed crooked, check that their edges are aligned and the guides are snug without pinching them. Try a smaller stack, and avoid mixing substantially different sizes in one batch.
Should old photos go through an automatic feeder?
Use a flatbed for fragile, curled, cracked, or especially valuable old photos unless the scanner's instructions say the feeder is safe for them. A cautious scan can take longer, but it avoids sending a questionable print through rollers.
For help choosing a method, read our guide to the best scanner for old photos. If a photo is fragile or damaged, consider asking an archivist or conservator how to handle it.
A scanner with a carrier sheet may support some delicate prints, but don't assume it makes every photo safe to feed. Learn what a scanner carrier sheet does and follow the specific instructions for the scanner and the photo.
Follow the specific instructions for the scanner and the photo.
How do you check scans before moving on?
Review the first files at full size and compare them with the original prints. Look for missing edges, blur, dust, color shifts, crooked images, and skipped or duplicated photos.
If the images look right, continue with the next small batch. Keep the originals in order until you confirm the scans are saved and backed up.
For large collections, make a second copy of the finished files on a separate storage device or backup service. Keep any edits in separate files so the unedited scans remain available.
What is the safest way to use a photo scanner with an automatic feeder?
For a photo scanner with an automatic feeder, check photo compatibility, prepare clean and flat prints, test a small stack, and review the first scans. Use a flatbed for prints that are fragile or outside the feeder's guidance.
Choose a photo-focused feeder if you regularly digitize compatible batches. Choose a flatbed such as the Canon LiDE 300 or LiDE 400 when you prefer to scan photos one at a time or need a stationary surface.
Frequently asked questions
Can you scan photos with an automatic document feeder?
Yes, if the scanner is designed to feed photos and the prints are in suitable condition and size. Check the manual for supported photo types, dimensions, and any required carrier sheet.
Feed a few prints first, then inspect the scans and the originals before continuing.
How many photos should I put in an automatic feeder?
Start with a small stack that sits below the scanner's capacity, with all prints aligned and facing the direction shown in its guide. Increase the batch only after a test scan feeds cleanly.
The right limit depends on the scanner and the photo sizes.
What resolution should I use to scan printed photos?
Use 300 dpi for everyday sharing, 600 dpi when you want more detail for archiving, or a higher setting when you plan to enlarge and the scanner supports it. Larger files take more storage and time.
Keep a high-quality master copy before editing or sharing.
Should old or fragile photos go through an automatic feeder?
Use a flatbed for brittle, curled, torn, sticky, or irreplaceable prints unless the scanner instructions clearly support that photo and condition. An automatic feeder moves prints through rollers, so inspect each one and use a carrier sheet when the scanner recommends it.