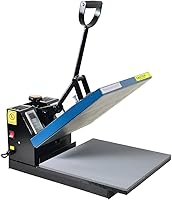
How to Use an HTVRONT Hat Heat Press
To use an HTVRONT hat heat press, position the cap firmly on the curved platen, place the transfer flat, and follow the transfer maker's temperature, pressure, and time instructions. Let the material cool as directed before peeling.
On this page (9 sections)
- What should you prepare before using an HTVRONT hat heat press?
- How do you position a cap on the press?
- What temperature and time should you use?
- How do you press the design?
- What should you check after pressing?
- Can screen printing supplies be used with a hat press?
- Can a flat heat press work for hat designs?
- What mistakes should you avoid?
- How do you use an HTVRONT hat heat press successfully?
To use an HTVRONT hat heat press, center the cap on the curved platen, smooth the front panel, place the transfer correctly, and use the transfer maker's recommended settings. The cap must stay stable while the heat and pressure reach the design evenly.
Hat pressing is less forgiving than pressing a flat shirt. Seams, eyelets, curved panels, stiff bills, and loose fabric can all stop the transfer from making full contact.
What should you prepare before using an HTVRONT hat heat press?
Prepare the cap, transfer, heat-resistant cover if the instructions call for one, and a clean work area. Read the instructions for both the HTVRONT press and the transfer material before heating anything.
Check the front panel for lint, moisture, loose threads, and deep wrinkles. A clean, dry surface gives the transfer a better chance of sitting flat.
Confirm that the design fits the usable front panel. Keep the transfer away from seams, raised embroidery, buttons, eyelets, and the edge of the bill.
If you're still choosing equipment, our guide to heat press machines explains the differences between flat presses, hat presses, and other formats. A reader comparing dedicated equipment can also see how to choose an automatic hat heat press.
How do you position a cap on the press?
Pull the cap over the curved platen and center the front panel before closing the press. The design area should face upward, with the bill outside the heated contact area unless the press instructions say otherwise.
Open the cap fully and loosen the back closure if needed. Pull the front panel over the platen without stretching it so tightly that the fabric distorts.
Find the center of the panel by checking the seams and the space between the sides. Place a small piece of low-tack tape on the transfer carrier if the material instructions allow it.
Run your fingers across the panel to remove folds. Pay special attention to the lower edge, where the crown can pull away from the platen.
A best hat press attachment for a heat press may help if your current press needs a curved surface. Hat pillows and pads can also help support a cap, as explained in our guide to the best heat press pillows for hats.
How should you place the transfer?
Place the transfer with its design facing the cap and its carrier or backing facing upward, unless the material instructions specify another arrangement. Check the transfer's orientation before pressing because a centered design can still be upside down.
Use a ruler or a paper guide to estimate placement before heating. Keep the design level with the cap's front seams rather than using the bill as your only reference.
Don't place a transfer over a curved seam. If the design is too large for the flat part of the front panel, reduce its size or choose a different cap.
What temperature and time should you use?
Use the settings supplied for the exact transfer and cap material. There is no single temperature or pressing time that works for every vinyl, sublimation transfer, screen-printing method, or fabric.
Set the temperature only after checking the transfer instructions. Then set the recommended time and adjust the pressure so the press closes firmly without forcing the cap out of position.
If the press has a digital control, confirm the display before starting. Keep your hands clear of the platen while it closes and opens.
For designs made with a printer and transfer material, our guide to what printer is compatible with heat transfer vinyl covers the printing side of the process. A mini heat press can help with small detail areas, but it does not replace an evenly supported hat platen for a full front-panel design.
How do you press the design?
Close the press smoothly and keep the cap still for the full programmed cycle. Do not lift the press early to check the transfer unless the instructions specifically allow an interruption.
The transfer should remain flat against the cap. If the carrier shifts as the press closes, stop and reposition it after the platen is safe to handle.
When the cycle ends, open the press carefully. Follow the transfer instructions for a hot peel, warm peel, or cold peel.
Removing the carrier too soon can lift the design.
If the instructions allow a second press, cover the design as directed and use the specified time. Avoid adding extra heat just because the transfer looks slightly different while warm.
What should you check after pressing?
Check the edges and fine details after the cap reaches the recommended peel stage. The design should be fully attached without lifted corners, bubbles, or sections that missed pressure.
If an edge is loose, don't pull it away. Recheck the material instructions and press that area again only if a second pressing is allowed.
Let the cap cool on a clean surface. Avoid bending the front panel while the transfer is still setting.
Wash and care for the cap according to the transfer and garment instructions. Heat-applied designs can need special washing, drying, or ironing treatment.
Can screen printing supplies be used with a hat press?
Screen-printing supplies are not the same as a ready-to-press heat transfer. A hat press applies heat and pressure, while screen printing places ink through a mesh screen and may require separate curing steps.
The Speedball Fabric Screen Printing Ink Starter Set includes 6 colors, with 4 fluid ounces of black, white, red, yellow, blue, and green ink in the set. It is intended for screen printing or brush application on fabrics, paper, and cardboard.
Choose this set if you want to make screen-printed artwork rather than apply a cut transfer. It works with cotton, polyester, blends, linen, rayon, other synthetic fibers, paper, and cardboard, but it is not for nylon.
The Caydo kit provides the frames and tools for making screen prints. It includes 3 wood frames with mesh in 10 x 14 in, 8 x 12 in, and 6 x 10 in sizes, plus squeegees, A4 transparency film, an ink knife, masking tape, wood mixing sticks, a glove, and instructions.
This kit suits beginners who want to create artwork for shirts, canvas tote bags, and tank tops. It can add a design-making step before you use a press, but it does not replace the cap platen or the heat settings required for a transfer.
Can a flat heat press work for hat designs?
A flat press can apply designs to hats only when the cap is held in a way that keeps the target area evenly supported. Curved hat attachments and pillows are designed to reduce gaps across the front panel.
The Fancierstudio Digital Heat Press has a 15 x 15 in heat press sheet, adjustable pressure, electronic time and heat control, a silicon-gel base board, and a Teflon-coated heat platen. It uses 110 volts and 1,800 watts, with a temperature range of 0 to 699°F and a time range of 0 to 999 seconds.
This press suits someone who needs a larger flat work surface for shirts, bags, mouse pads, or similar items. It can be less convenient for curved caps unless you add suitable support and confirm that the setup creates even contact.
For a hat-specific workflow, keep the cap stable and use the curved HTVRONT platen as instructed. Use a heat press mat only when it fits the equipment instructions and does not change the cap's position.
What mistakes should you avoid?
The most common hat-press mistakes are poor positioning, uneven pressure, wrong settings, and early peeling. Each one can leave part of the design attached while another section lifts.
Avoid pressing across seams or embroidery. Don't stretch the cap so far that the panel changes shape when the press closes.
Don't use the same temperature and time for every transfer. Material instructions take priority over general settings from another project.
Don't slide the cap while the platen is hot. If the transfer is misplaced, stop and wait until the equipment is safe to handle before repositioning it.
How do you use an HTVRONT hat heat press successfully?
Successful hat pressing comes down to a smooth front panel, centered artwork, even contact, and the correct transfer settings. Prepare the cap first, then let the material instructions determine the heat, pressure, time, and peel stage.
Choose a dedicated curved press when hats are your main project. Choose a flat press when you also need a larger work area for shirts and other flat items.
For the next project, read how to heat press a hat for a broader workflow. Pick the HTVRONT setup when stable cap positioning is your priority, and inspect every edge before the finished hat is put into use.
Frequently asked questions
How do you position a hat in an HTVRONT hat heat press?
Place the cap over the curved hat platen with the front panel centered and the bill outside the pressing area. Smooth the fabric so it has no folds, then secure the cap according to the press instructions before adding the transfer.
What temperature should you use on an HTVRONT hat heat press?
Use the temperature, time, and pressure recommended for your specific transfer and hat material. Heat transfer vinyl, sublimation materials, and other transfers can require different settings, so check the material instructions instead of choosing one setting for every cap.
Can you press a curved hat with a flat heat press?
A flat heat press can work only when the hat is supported and the transfer area can contact the platen evenly. A curved hat press or hat attachment usually makes positioning easier because it follows the front panel's shape.
Why does a hat transfer peel off after pressing?
A transfer can peel when the cap was wrinkled, pressure was uneven, the temperature or time was wrong, or the material was peeled at the wrong stage. Recheck the transfer instructions, press the design area evenly, and allow the recommended cooling time.