How to Use a Mini Heat Press
To use a mini heat press, heat the platen, position the transfer, and press with steady downward pressure for the time your material requires. Lift, peel as directed, and let the item cool before stretching or washing it.
On this page (9 sections)
- What is a mini heat press best for?
- How do you use a mini heat press step by step?
- How do you place a transfer with a mini heat press?
- When should you peel a transfer?
- How do you heat set screen printed fabric?
- What supplies help you screen print at home?
- When should you choose a full-size heat press instead?
- How do you care for a mini heat press?
- What mistakes should you avoid with a mini heat press?
To use a mini heat press, heat the platen to the setting listed for your transfer, press the design onto a flat garment, then peel the carrier sheet at the right temperature. Small presses work best in short, controlled passes, because their platen covers only a small area at a time.
You do not need a full-size machine for logos, names, patches, or small graphics. A mini press gives you close control over edges and curved areas, but it also asks for slower, more even movement.
This guide covers settings, pressure, placement, peeling, and care.
What is a mini heat press best for?
A mini heat press is best for small transfers on shirts, sleeves, hats, bags, and other flat items. Its narrow platen fits spaces that a large platen cannot reach.
It also suits small projects where you want to move the press across a design in sections. You can work around seams, collars, and pockets without forcing fabric under a large plate.
A heat press machine in a full-size format still makes sense for large, full-front designs. A mini press is a companion tool, not a replacement for every job.
How do you use a mini heat press step by step?
To use a mini heat press, preheat it, pre-press the garment, place the transfer, press in sections, and peel when the carrier allows. Keep the press moving slowly and keep pressure steady.
Start by setting the temperature and time for your specific material. Heat transfer vinyl, sublimation transfers, and screen printed designs do not share one universal setting.
Lay the garment flat on a firm surface. A heat press mat helps you keep the fabric stable while you work in sections.
Press the empty platen on the garment for a few seconds first. This step removes moisture and wrinkles that can weaken bonding.
Place the transfer with the correct side down and check its position before you apply heat. Hold the press straight down rather than sliding it across the design.
Work across the design in overlapping sections. Lift, move, and press again until the full design has received equal heat and pressure.
How do you set heat and time for a mini heat press?
Set heat and time to the range listed for your transfer material, not to a guess. Check the instructions for vinyl, sublimation paper, or ink before you start.
For a Cricut sublimation workflow, see Cricut heat press settings for sublimation.
Some mini presses show only a heat setting and a timer. Others let you set both and sound a buzzer when time ends.
Use that timer as a guide, and keep the press in place for the full time.
Large designs need more sections than small ones. Move in small steps so one edge does not get extra heat while another area stays cool.
How much pressure should you use with a mini heat press?
Use firm, steady pressure, with the press held flat and still. Too little pressure can leave edges lifting, and too much pressure can distort thin fabric.
Press straight down and avoid dragging the hot platen across the garment. A slight rocking motion can loosen one side of a transfer before the other side bonds.
If your transfer needs heavy pressure, press in shorter passes and check the edges after each pass. Add pressure only when the material calls for it.
How do you place a transfer with a mini heat press?
Place a transfer by measuring from a fixed point, centering the design, and checking it from the front before pressing. Small errors show clearly on small garments.
Use painter's tape or a light heat resistant tape to hold corners in place when needed. Keep tape away from the area where the hot platen will sit.
For a centered chest design, fold the garment in half to find the middle. Mark the center with a washable marker only if the mark will not show through or damage the fabric.
For names and numbers, align the bottom edge with a seam or a taped straight line. Our guide to how to use Cricut EasyPress Mini covers similar alignment steps for a handheld model.
When should you peel a transfer?
Peel a transfer at the temperature stated for that material, either hot, warm, or cold. Peeling too early or too late can pull small details off the garment.
Start at a corner and pull slowly at a low angle. If a detail lifts with the carrier, press it again for a short time and try again after it cools a bit more.
For layered vinyl, peel the bottom layer first, then add the next layer and press again. Keep each layer aligned before you move the press.
Sublimation transfers often release while warm, but the printed sheet must stay flat until it lifts cleanly. Do not stretch the garment while the print is still hot.
Screen printed ink needs heat setting after it dries, which is a different process from pressing a ready made transfer. The Speedball Fabric Screen Printing Ink Starter Set suits fabric printing projects where you apply ink by screen rather than by heat transfer.
How do you heat set screen printed fabric?
Heat set screen printed fabric by letting the ink dry, then applying heat according to the ink instructions. The Speedball set states that its water based ink becomes permanent after heat setting.
This process differs from pressing vinyl. You print the design first, let it dry, and then use heat to set the ink into the fabric.
Use a mini press in even sections and keep the platen moving. Uneven heat can leave some areas under set while others become stiff.
Test on a scrap of the same fabric before you print a finished garment. That test shows how the ink feels and whether the color bonds evenly.
What supplies help you screen print at home?
Screen printing supplies help when you want to print your own designs instead of buying ready made transfers. A starter kit gives you frames, squeegees, and tools for mixing and spreading ink.
The Caydo kit includes 3 wood frames in 10 x 14 inch, 8 x 12 inch, and 6 x 10 inch sizes. It also includes 2 squeegees, transparency film, an ink knife, masking tape, and 10 wood mixing sticks.
You can use these frames to print on T-shirts, canvas tote bags, and tank tops. The smaller frames suit small designs, while the larger frame covers a wider area.
A mini heat press can then help with heat setting, depending on the ink you choose. Always follow the ink maker's heat setting instructions for the fabric you are using.
When should you choose a full-size heat press instead?
Choose a full-size heat press when you press large designs often or need to cover a whole shirt front in one pass. A 15 x 15 inch platen covers more area and gives more even pressure.
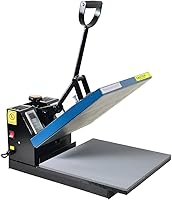
The Fancierstudio Digital Heat Press 15 x 15 has a platen with Teflon coating and adjustable pressure. It also has electronic time and heat control, with a temperature range of 0 to 699 degrees F and a time range of 0 to 999 seconds.
A full-size press weighs more and needs more table space. Its dimensions are 33 x 23 x 20 inches, so measure your work area before you buy.
A mini press remains better for sleeves, hats, baby clothes, and tight spaces. Many crafters keep both tools and pick the one that fits the design.
Our best portable heat press machine guide compares smaller options, while our best mini heat press guide focuses on handheld models.
How do you care for a mini heat press?
Care for a mini heat press by turning it off after each use, wiping the platen when cool, and storing it where the plate will not get knocked. A dirty platen can transfer residue onto the next garment.
Let the press cool fully before you clean it. Use a clean cloth made for heat press platens and avoid sharp tools that can scratch the coating.
Check the cord and handle before each session. Stop using the press if the cord is damaged, the handle feels loose, or the heat control acts unevenly.
Use a heat press mat to protect your table and keep thin items flat. A mat also helps you move the garment without shifting the design.
A best heat press platen cover can protect the plate during storage and reduce residue on the surface. Follow the cover maker's instructions for the size and shape of your platen.
What mistakes should you avoid with a mini heat press?
Avoid rushing the press, guessing at settings, and peeling before the transfer is ready. Most failed transfers trace back to one of those three habits.
Do not slide the press across a design while it is hot. Sliding can shift the transfer and create uneven edges.
Do not press a wrinkled garment and expect the design to bond well. Pre-press the fabric, smooth it flat, and check the placement again before the main press.
Do not use a mini press on a large design and expect the same speed as a full-size machine. Section by section work takes longer, but it gives you better control.
Check cricut heat press reviews if you are comparing handheld models before you buy. That comparison can help you match the platen size and controls to the projects you plan to make.