What Blade Should You Use for Cutting Vinyl?
For most vinyl, use a fine-point blade matched to the material: a standard 45 degree blade for everyday adhesive vinyl, a deeper blade for thicker or glitter vinyl, and a larger blade only when your machine and material need it. Check depth, pressure and mat condition before you change blades.
On this page (12 sections)
- What blade to use for cutting vinyl on a standard machine?
- How blade angle changes the cut
- What blade depth should you set for vinyl?
- How pressure affects vinyl cutting
- How to know when a blade is dull
- How mat condition affects blade choice
- Which blade works for glitter and thick vinyl?
- Which blade works for heat transfer vinyl?
- How do you set up and test a new blade?
- How should you store and care for blades?
- Which tools help after the blade cuts?
- What is the best blade for cutting vinyl?
For most vinyl, use a fine-point blade matched to the material, not the deepest blade you own. A 45 degree blade handles standard adhesive vinyl well, while a 60 degree blade suits thicker and glitter vinyl.
What blade to use for cutting vinyl also depends on your machine. If you are choosing equipment for both printing and cutting, compare vinyl printer cutter combos.
Some machines use replaceable fine-point blades, and some use larger drag blades.
Match the blade shape to the holder your machine accepts.
Keep the rest of the setup in mind too. A clean mat, a sharp blade and the right depth matter as much as the blade angle.
What blade to use for cutting vinyl on a standard machine?
The best starting choice is a 45 degree fine-point blade for standard adhesive vinyl. It gives you small, controlled cuts without cutting too deep into the backing.
Use this blade for signs, decals, labels and everyday vinyl projects. It also works for many papers and thin cardstock, depending on your machine.
Test first on a scrap piece of the same vinyl. If the cut is clean and weeding is easy, keep the setting.
If it tears or drags, check the blade before you change the design.
Our score weighs specs, features and buyer feedback against what you're shopping for. That matters here because a blade that works for paper may not work for thick vinyl.
When a 45 degree blade is enough
A 45 degree blade is enough for standard permanent vinyl, removable vinyl and many heat transfer vinyl sheets. It cuts small letters and shapes without a large blade cutting wider than needed.
It is also the blade most machines ship with. That makes it the safest first test when you are new to vinyl cutting.
If your vinyl is thin and smooth, a fresh 45 degree blade usually gives the cleanest result. Worn blades are the top cause of ragged cuts.
When to try a 60 degree blade
A 60 degree blade has a steeper angle and can cut thicker material with less drag. It often suits glitter vinyl, thicker heat transfer vinyl and some specialty vinyl.
It can also help with small details on thicker sheets because the blade enters the material at a different angle. Test both blades on the same design before you decide.
Do not use a 60 degree blade for every job. On thin vinyl, it may cut deeper than you want and make weeding harder.
Firm rule: start with a fresh 45 degree fine-point blade for standard vinyl, then test a 60 degree blade only for thicker or glitter material.
How blade angle changes the cut
A higher blade angle changes how the blade enters and moves through vinyl. A 60 degree blade cuts thicker stock with less resistance than a 45 degree blade.
The angle also affects small corners and fine lines. A blade that is too blunt or too steep for the material can pull at the edges instead of slicing cleanly.
Think of the blade as a small knife moving across a sheet. The sharper the edge and the better the angle, the less force the machine needs.
Blade angle is not the same as blade depth. Depth controls how far the tip goes, while angle controls the shape and angle of the cutting edge.
Keep your machine's blade holder clean. Old vinyl bits around the tip can cause dragging even when the blade itself is still sharp.
Firm rule: choose blade angle for material thickness first, then adjust depth in small steps.
What blade depth should you set for vinyl?
Set the blade depth so the tip cuts through the vinyl but not deep into the backing. Set depth just past the vinyl layer, then test and adjust by small steps.
If the cut is too shallow, the vinyl will not release cleanly. If it is too deep, the backing scores and the vinyl becomes hard to weed.
Start with the machine's vinyl setting, then change one thing at a time. Change depth or pressure, not both, so you know which change helped.
Use a test piece with straight lines, curves and small letters. That test shows if the blade tracks well and if the vinyl weeds without tearing.
For heat transfer vinyl, the backing and carrier can change how depth feels. Test heat transfer vinyl separately from adhesive vinyl.
Firm rule: adjust depth for the exact sheet you are cutting, and retest when you switch vinyl types.
How pressure affects vinyl cutting
Pressure controls how hard the blade presses into the material. Use the lowest pressure that cuts cleanly, because extra pressure can cut into the backing.
Too little pressure leaves uncut spots. Too much pressure can flatten the blade path and make small details messy.
On many machines, pressure and depth work together. If you raise pressure, you may need less depth, and the reverse can also be true.
Start with the recommended vinyl setting. Then test a small design and look at both sides of the sheet.
If the vinyl weeds easily and the backing is intact, the pressure is close. If the backing shows deep lines, lower the pressure or raise the blade slightly.
Firm rule: change pressure in small steps and stop as soon as the vinyl cuts cleanly.
How to know when a blade is dull
A dull blade shows drag, tearing, fuzzy edges or missed detail. You may also need more pressure than you needed before.
Look for rough edges on curves and small letters. A sharp blade leaves a smooth path, while a dull blade pulls and skips.
Check the blade tip under good light. A bent, chipped or dirty tip often causes poor cuts even if the blade is new.
Glitter vinyl wears blades faster because it has a thick, textured surface. Thick vinyl and repeated deep cuts also wear the edge faster.
Keep a log of when you changed the blade and what you cut. That note helps you spot patterns by material.
Firm rule: replace the blade when the same test design gets worse with no other change.
How mat condition affects blade choice
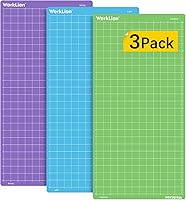
A worn mat can make a good blade look bad. A sticky, clean mat holds vinyl flat so the blade can cut evenly.
If the mat has lost stickiness, the vinyl can shift during the cut. That shift creates jagged lines and missed details.
Dirty mats also add grit and old bits under the vinyl. The blade then has to cut through debris as well as the sheet.
Clean the mat as your machine maker directs. Replace the mat when it no longer holds vinyl flat through a full cut.
If you cut on a mat with deep grooves, the blade can catch in those grooves. That catch can look like a dull blade.
Our craft cutting machines guide covers machine types and mat use. Read it if you are comparing machines before you buy blades.
Firm rule: test a new blade on a clean, grippy mat before you blame the blade.
Which blade works for glitter and thick vinyl?
Glitter vinyl needs a blade that can clear the textured surface without dragging. A 60 degree blade or a deeper fine-point blade often works better.
Test with a simple shape first. Glitter vinyl can shed particles that build up around the tip during a long cut.
Clean the blade tip between cuts when glitter builds up. That small step can prevent skipped lines and torn edges.
Thick vinyl may need more depth, but depth alone does not fix a worn tip. A fresh blade at the right depth usually beats a dull blade pushed deeper.
If your machine does not support a deeper blade, do not force the holder. Use the blades your machine accepts and test the material first.
For blade shapes and replacement options, see best vinyl cutter blades before you stock up.
Firm rule: use a 60 degree blade or a supported deeper blade for glitter and thick vinyl, and clean the tip often.
Which blade works for heat transfer vinyl?
Heat transfer vinyl often cuts well with a standard 45 degree fine-point blade. Thicker heat transfer vinyl may need a 60 degree blade.
The carrier sheet changes the feel of the cut. A setting that works for adhesive vinyl may cut too deep or too shallow on heat transfer vinyl.
Cut heat transfer vinyl with the carrier side up or down as your machine and material guide directs. Keep the sheet flat on the mat.
Test a small design, then weed it before you cut the full design. Weeding shows if the cut depth is right.
If you plan to print before you cut, read Can I Print On Vinyl With An Inkjet Printer? to check material compatibility. Printed vinyl can change how the blade tracks.
Firm rule: test heat transfer vinyl separately, and do not use adhesive vinyl settings by default.
How do you set up and test a new blade?
Install the new blade with clean hands and a clean holder. Set the depth for the vinyl, run a small test, then adjust one setting at a time.
First, load a scrap piece of the same vinyl. Place it on a clean mat and smooth it flat.
Second, run a test with lines, curves and small shapes. Keep the test simple so you can see the change clearly.
Third, weed the test by hand. Clean weeding means the depth and pressure are close.
Fourth, look at the backing. Deep score lines mean the cut went too deep.
Fifth, change only depth or pressure, then test again. Small steps are faster than guessing.
Keep the old blade until the test passes. If the new blade performs worse, check the holder and mat before you install another blade.
A best vinyl cutter hand tool can help with weeding and trimming, but it cannot fix a dull blade.
Firm rule: always run a test cut on scrap vinyl before you cut your final design.
How should you store and care for blades?
Store blades dry and out of reach of children. Keep spare blades in their caps or cases so the tips stay sharp and clean.
Do not store loose blades in a drawer with tools. A knocked tip can ruin a blade before you use it.
Keep the blade holder clean. Wipe away vinyl dust and glitter after thick materials.
Do not use a blade holder that is cracked or loose. A loose holder lets the blade wobble and makes straight lines wavy.
Use the right holder for your machine. A blade that fits the wrong holder can sit at the wrong depth.
If you cut on the go, a case helps. The VIGEGARI Carrying Case for Cricutt Joy is one option for storing a small machine and tools together.
The larger LEFOR·Z Carrying Case Compatible with Cricut Joy measures 15 x 10 x 8.2 in and has removable dividers. It also has a transparent top pocket for mats and side pockets for tools.
Firm rule: store blades capped, dry and separate from other tools, and replace a loose holder.
Which tools help after the blade cuts?
A sharp blade is only part of the job. Good weeding and trimming tools help you finish cuts without tearing small details.
Keep a weeding tool, a scraper and a trimmer near your machine. Those tools help you lift waste vinyl and smooth the final piece.
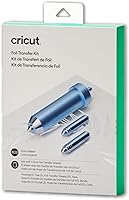
For foil accents on cards, the Cricut Foil Transfer Kit uses interchangeable fine, medium and bold tips. It works with Cricut Maker and Cricut Explore machines.
That kit uses pressure, not heat, and the tips are for foil work rather than vinyl cutting. Keep foil tips separate from vinyl blades so the tips stay clean.
A worn cutting strip can also affect cuts on some machines. See best vinyl cutter cutting strip if your machine shows uneven cuts across the width.
If you print designs for cutting boards, read Best Sublimation Printer For Cutting Boards before you choose materials. Print settings and cut settings are separate steps.
For machine reviews, see silhouette cameo 5 alpha reviews if you are comparing a Silhouette machine with your current setup.
Firm rule: keep weeding tools clean and separate, and use foil tips only for foil work.
What is the best blade for cutting vinyl?
The best blade for cutting vinyl is the fresh fine-point blade that matches your vinyl thickness and your machine holder. For most standard vinyl, that is a 45 degree blade.
Glitter and thick vinyl often need a 60 degree blade or a supported deeper blade. Heat transfer vinyl often starts with a 45 degree blade, then moves to a 60 degree blade if needed.
Your depth and pressure settings matter as much as the blade. Set depth just past the vinyl, use the lowest pressure that cuts cleanly, and test on scrap first.
Replace the blade when test cuts tear, drag or need more pressure than before. A clean mat and a clean holder prevent false alarms.
Pick a 45 degree blade for standard adhesive vinyl, a 60 degree blade for thicker or glitter vinyl, and a supported deeper blade only when your machine allows it.
Frequently asked questions
What blade should I use for cutting vinyl?
Use a fine-point blade matched to the vinyl. A 45 degree blade suits most standard adhesive vinyl.
A 60 degree blade suits thicker, glitter or heat transfer vinyl.
A deeper blade can cut thicker material, but only when your machine supports it and the depth is set correctly.
How often should I change a vinyl cutting blade?
Change the blade when cuts tear, skip, look fuzzy or require more pressure than before. Blades wear faster with glitter vinyl, thick vinyl and dirty mats.
Keep a spare blade so you can swap it and test the same design again.
Can a dull blade ruin vinyl?
A dull blade often drags, tears small details and leaves rough edges. It can also cause the machine to cut too deep as you raise pressure to compensate.
Replace a worn blade instead of forcing a cut.
Do I need a different blade for heat transfer vinyl?
Often a standard 45 degree fine-point blade works for heat transfer vinyl. Thicker or glitter heat transfer vinyl may need a 60 degree blade or a deeper setting.
Always test on a scrap piece first.