How to Use an HTVRONT Heat Press
To use an HTVRONT heat press, set the temperature and time, prepare the garment and transfer, position the project on the tray, then press the R button when the machine is ready. Let the press complete its cycle before removing the project.
On this page (10 sections)
- What should you do before using an HTVRONT heat press?
- How do you set temperature and time?
- How do you load a garment into an HTVRONT press?
- How do you start an HTVRONT automatic pressing cycle?
- How do you check the transfer after pressing?
- What safety steps matter during use?
- How can you organize a faster pressing workflow?
- What common mistakes should you avoid?
- Can you use an HTVRONT heat press for hats?
- How do you choose the right HTVRONT heat press workflow?
To use an HTVRONT heat press, set the heat and time, prepare the garment and transfer, place the project on the tray, and press the R button after the machine is ready. Keep the work area clear, follow the transfer material instructions, and wait for the automatic release before removing the project.
The exact controls can vary by HTVRONT model. The basic workflow stays the same: prepare, heat, position, press, release, and inspect.
If you are still deciding which machine fits your projects, compare the main heat press machine types before you buy. An automatic model can suit repeated garment work, while a handheld press may suit smaller storage spaces.
What should you do before using an HTVRONT heat press?
Prepare the garment, transfer, pressing area, and settings before starting the machine. Read the instructions for your HTV, sublimation material, or other transfer because temperature, time, and peeling steps can differ.
Place the press on a stable, heat-safe surface with enough room to move the tray. Keep cords and loose materials away from the hot area.
Wash and dry the garment if the transfer instructions require it. Smooth the fabric and remove folds from the area that will receive the design.
Check the design before pressing. Confirm its position, orientation, and any required carrier sheet or protective layer.
How do you set temperature and time?
Choose the temperature and time recommended for the transfer material and garment, then enter those settings on the press. Do not use one setting for every vinyl, fabric, or sublimation project.
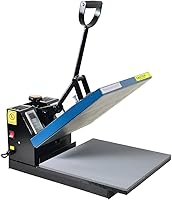
The HTVRONT Auto Heat Press Machine for T Shirts with Auto Release, 15X15 has 4 fast modes and 2 customer-defined modes. Its automatic mode is intended for automatic pressing and release, and its temperature reaches up to 410°F.
This model can adjust to project thickness up to 1 in. That range can help when your project is not a thin, single-layer garment, but you still need to place the item flat and follow the transfer instructions.
The machine reaches a common-use temperature of 320°F within 4 minutes, according to HTVRONT. Allow the press to reach the selected setting before starting the cycle.
For a handheld alternative, the Cricut EasyPress® SE has a 12 in x 10 in ceramic-coated heat plate and reaches controlled temperatures up to 400°F. For its connected workflow, see how to use Cricut EasyPress 3.
Cricut also provides a Heat Guide with time and temperature instructions for supported projects.
Its size suits larger shirts, sweatshirts, blankets, pillows, and bags, but you need to apply even pressure with the handle. A handheld press also requires you to manage the placement and lifting yourself.
How do you load a garment into an HTVRONT press?
Lay the garment flat on the pressing tray and smooth the pressing area before adding the transfer. Place seams, zippers, buttons, and thick folds away from the main pressing zone when possible.
Center the design by measuring from the garment edges or using a temporary fold as a guide. Check the transfer from the front before closing the press.
Push the tray completely into the machine. On an automatic HTVRONT press, the tray position matters because the machine starts its pressing process after the project is inserted and the R button is pressed.
The HTVRONT Auto Heat Press 2 has a 15 x 15 in pressing area and supports project heights up to 1.77 in. Compare an automatic 16x20 heat press if you need a larger area.
Its pressure can be adjusted up to 170 lb, which gives you more control when working with different project thicknesses.
This model also has a screen with 7 angle positions from 0° to 75°. Adjusting the screen can make the controls easier to read while you prepare several projects.
How do you start an HTVRONT automatic pressing cycle?
Push the tray fully into the machine, confirm the settings, and press the R button to begin. Keep your hands away from the hot pressing area while the machine lowers and applies heat.
The HTVRONT Auto Heat Press Machine for T Shirts with Auto Release automatically lowers, adjusts to the project thickness, and rises when the timer ends. Its drawer-style placement plate helps keep your hands away from the hot area while loading the project.
The HTVRONT Auto Heat Press 2 also starts after you press the R button. It buzzes when the timer ends and releases the material automatically.
Do not pull the tray out early unless the instructions for your model specifically allow it. Interrupting a cycle can affect the transfer and exposes you to the hot plate.
How do you check the transfer after pressing?
Wait for the cycle to finish, remove the garment carefully, and follow the transfer material's peeling instructions. Some transfers require a hot peel, warm peel, or cold peel, so use the instructions for your specific material.
Look for lifted edges, incomplete areas, or fabric wrinkles after the garment cools enough to handle. If the transfer instructions allow a second press, cover the design as directed and repeat only for the recommended time.
Avoid pressing a design again just because the surface looks different from the carrier sheet. Extra heat can damage some fabrics or transfers.
For repeated garment work, an automatic model can reduce the need to hold the press down. If you want two work areas, compare an automatic dual station press.
Our guide to the best automatic heat press compares this workflow with other automatic options.
What safety steps matter during use?
Keep the hot plate, tray, and garment area clear, and never touch the heating surface during or immediately after a cycle. Use the handle and follow the machine instructions for loading and unloading.
Both HTVRONT models described here include an automatic shutoff after 15 minutes without operation. That feature does not replace supervision, especially when children, pets, loose fabric, or other heat-sensitive items are nearby.
The first HTVRONT model uses multilayer heat insulation material and H-Cooling technology for cooling after shutdown. The HTVRONT Auto Heat Press 2 also includes an auto-off feature, but the outside can still be hot after pressing.
Place the machine where the hot plate cannot contact a wall, cord, paper, or plastic item. Keep the area dry and avoid touching controls with wet hands.
How can you organize a faster pressing workflow?
Prepare several garments and transfers before heating the press, then process them in the same order each time. Group projects that use the same material and settings to reduce repeated adjustments.
A simple workflow is:
- Read the transfer instructions.
- Prepare and smooth the garment.
- Set the temperature and time.
- Wait for the machine to heat.
- Position the transfer.
- Insert the tray fully.
- Press the R button.
- Wait for release and inspect the result.
Write down settings that work for a specific garment and transfer combination. Treat those notes as a starting point, because a different fabric or transfer can need different settings.
If you work with larger or thicker items, compare best automatic heat press 15x15 models. For HTVRONT-specific comparisons, see our HTVRONT heat press reviews.
What common mistakes should you avoid?
The most common mistakes are starting before the press reaches temperature, placing the garment over a seam, using the wrong setting, and opening the press before the timer ends. A careful setup prevents most uneven transfers.
Do not guess the temperature from the garment alone. Use the transfer instructions and adjust only when the material guidance calls for it.
Do not stack thick folds under the design. Smooth the garment and move bulky seams away from the pressing area.
Do not assume every HTVRONT model uses identical controls. Check whether your machine uses the R button, an automatic mode, adjustable pressure, or another control layout.
An auto press also needs clear space around the tray and hot plate. If you prefer a manual workflow for smaller projects, compare the HTVRONT auto heat press reviews with handheld options.
Can you use an HTVRONT heat press for hats?
Use a hat press designed for curved caps when your project needs a shaped pressing surface. A flat 15 x 15 in press is intended for flat items, so do not force a curved hat into a flat tray.
Review our guide to a top and bottom heat hat press if you regularly decorate caps. The right press shape matters as much as temperature and time.
For flat garments, the HTVRONT Auto Heat Press Machine for T Shirts with Auto Release, 15X15 and HTVRONT Auto Heat Press 2 both provide 15 x 15 in pressing areas. Choose between their available controls, pressure adjustment, project-height range, and automatic workflow based on the items you make.
How do you choose the right HTVRONT heat press workflow?
Choose an automatic HTVRONT press when you want the machine to handle the downward cycle and release after the timer. Choose a handheld press when you want a lighter, more direct process for projects such as shirts, bags, pillows, or blankets.
The first HTVRONT model suits users who want automatic pressure adjustment for projects up to 1 in thick, fast modes, and an automatic mode for repeated work. The HTVRONT Auto Heat Press 2 suits users who want adjustable pressure up to 170 lb and more height for thicker items up to 1.77 in.
The Cricut EasyPress® SE suits users who prefer a 12 x 10 in handheld press with a ceramic-coated heat plate and guided time and temperature instructions. Its 400°F upper temperature rating is lower than the 410°F rating of the HTVRONT models here.
Start with the transfer material, garment type, project size, and thickness. Then choose the machine whose controls match the way you plan to work.
Frequently asked questions
How do you use an HTVRONT heat press?
Set the temperature and time for your transfer, wait for the press to heat, place the prepared project on the tray, and push the tray fully into the machine. Press the R button to start the cycle, then wait for the timer and automatic release before removing the garment.
What temperature should I use on an HTVRONT heat press?
Use the temperature recommended for your transfer material and garment rather than choosing one setting for every project. The HTVRONT Auto Heat Press Machine for T Shirts with Auto Release, 15X15 reaches up to 410°F, while the HTVRONT Auto Heat Press 2 reaches up to 410°F.
How do you place a shirt in an HTVRONT heat press?
Lay the shirt flat on the pressing tray, smooth the fabric, and place the transfer where you want it before starting the cycle. Keep the design and garment area flat so the heat plate can contact the transfer evenly.
Why does my HTVRONT heat press not start?
Check that the machine has reached the selected temperature, the project tray is pushed completely into the machine, and the correct start control has been pressed. For automatic HTVRONT models, the R button starts the pressing cycle after the tray is fully inserted.