How to Use a Heat Press Temperature Chart
To use a heat press temperature chart, match the transfer material first, then set the temperature, time, and pressure in that order. Check the fabric, pre-press to remove moisture, and test on a scrap piece before pressing the real garment.
On this page (10 sections)
- How does a heat press temperature chart work?
- What temperature should you use for heat transfer vinyl?
- What temperature should you use for sublimation printing?
- How do you read time and pressure on the chart?
- Why should you pre-press before you press?
- How do you test a chart setting before a real order?
- What should you do when a transfer fails?
- How do patches and jerseys change the chart settings?
- Which tools help you follow a temperature chart?
- How should you keep notes for future presses?
To use a heat press temperature chart, start with the material, not the dial. Find your transfer type in the chart, then set the temperature, time, and pressure that row lists for that fabric.
A good chart saves you from guessing. It also keeps you from using vinyl settings on a sublimation blank, or patch settings on a thin jersey.
How does a heat press temperature chart work?
A heat press temperature chart works by matching three things: transfer material, fabric, and press settings. Temperature melts or activates the transfer, time lets the heat soak in, and pressure pushes it into the fabric.
Read the chart left to right. First find your material, such as heat transfer vinyl, sublimation paper, or a patch.
Then find the fabric column, because cotton, polyester, and blends react very differently to the same heat.
Use the chart as a starting point, not as a final promise. You should test a scrap shirt or a hidden area first, especially on dark, light, or synthetic fabrics.
If you are new to pressing, a heat press machine guide can help you pick a press with even heat and clear digital controls. Even heat matters more than a very high top temperature.
What temperature should you use for heat transfer vinyl?
For heat transfer vinyl, use the range printed on the vinyl sheet, often near 305 to 320 degrees F. Press for about 10 to 15 seconds at medium pressure, then peel as the sheet directs.
Some vinyl peels warm, and some peels cold. That detail is on the chart or the product sheet, and it matters as much as the temperature.
Cotton shirts usually handle vinyl well. Polyester and blends can wrinkle or scorch if you go too hot, so check the fabric label before you press.
For shirt projects, read how to heat press vinyl on a shirt before you start. It covers weeding, layering, and the order in which you press each color.
How do you set pressure for vinyl?
Set pressure so the platen meets the garment with firm, even contact, but not so much force that you fight the handle. A light shirt press needs less force than a thick sweatshirt.
If the vinyl lifts at the edges, pressure may be too light or the fabric may have shifted. If the shirt gets a shiny mark, heat or pressure may be too high for that fabric.
Adjust pressure in small steps. Change one setting at a time, then test again on a scrap piece.
What temperature should you use for sublimation printing?
For sublimation, use higher heat and a longer dwell than you would use for vinyl. Many sublimation charts start near 385 to 400 degrees F for 45 to 60 seconds at medium to firm pressure.
Sublimation turns ink into a gas that bonds with polyester. That is why it needs polyester fabric, or a garment with a polyester coating, and why cotton alone does not work.
For more detail, see What Temperature Is Best for Sublimation Printing?. It explains why small heat changes can shift colors.
Paper choice matters too. Sublimation paper, ink, and a polyester blank need to be paired correctly, and the chart cannot fix a mismatch between them.
Press sublimation transfers face down with the printed side in full contact with the fabric. Any gap can make the image look faded or blurry.
How do you read time and pressure on the chart?
Read time and pressure as a pair with temperature, not as separate tips. A chart may list 15 seconds at medium pressure for vinyl, and 60 seconds at firm pressure for sublimation.
Time starts when the platen closes and the timer runs. If you open the press early, the transfer may not bond fully, even if the temperature was right.
Pressure should be even across the whole design. A loose corner can come from a wrinkle, a thick seam, or a platen that does not sit flat.
Use a Teflon sheet or parchment sheet if your chart calls for one. It protects the platen from ink, adhesive, and glitter, and it helps you re-press without sticking.
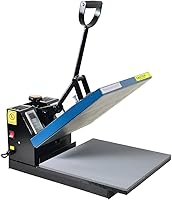
Start with the Fancierstudio press below if you want digital time and heat control for chart-based work.
Why should you pre-press before you press?
Pre-press for about 3 to 5 seconds to remove moisture and wrinkles. That short press helps the transfer bond, and it shows you whether the garment lies flat.
Cotton holds moisture, and that moisture can block adhesion. A quick pre-press also relaxes the fabric so your design stays straight.
Let the garment cool for a few seconds after the pre-press if the chart asks for it. Then place your transfer and press for the full time in the chart.
If you are pressing how to heat press a tshirt, a pre-press is a simple step that prevents many peeling problems.
How do you test a chart setting before a real order?
Test every new material and fabric combo on a scrap piece that matches the real garment. Mark the temperature, time, and pressure on the scrap so you can repeat what worked.
Press the test, peel it as directed, and check the edges. They should feel bonded, not stiff, and the fabric around the design should not look scorched or shiny.
Wash the test piece once, then check again. Some transfers look fine at first and fail after a wash, so a wash test tells you more than a touch test.
Keep a small log with material, fabric, settings, and results. That log becomes your own chart for the blanks you use most.
If the test fails, change one variable at a time. It is easy to chase the right setting when you only move temperature, or only move time, in each test.
What should you do when a transfer fails?
When a transfer fails, check moisture, temperature, time, and pressure in that order. Most peeling problems come from one of those four causes.
Too little heat can leave adhesive weak. Too much heat can damage light fabric, change color, or make vinyl brittle.
Too little time can stop the bond before it forms.
Too little pressure can leave edges loose. Too much pressure can push adhesive through fabric or leave a visible outline on sensitive material.
Look at the failure for clues. Clean peeling often points to heat or time.
Edge lifting often points to pressure, wrinkles, or moisture. Scorch marks point to heat that is too high for the fabric.
For screen printed designs that need heat setting, the ink set below is a different path from vinyl or sublimation.
How do patches and jerseys change the chart settings?
Patches and jerseys change the chart because thickness and fabric stretch alter heat flow and pressure. A thick patch may need more time, and a mesh jersey may need gentler pressure.
Jersey mesh can melt or distort if the heat is too high. It also needs care with placement, because a design can shift on a stretchy fabric.
If you work with team wear, read how to heat press on a jersey for placement tips that pair with your chart.
For patches, check the backing type first. Some patches need a longer dwell, and some need a second press after the first side is set.
Our guide to the best heat press for patches can help you choose a platen size and pressure style for thick items.
Which tools help you follow a temperature chart?
The tools that help most are a Teflon sheet, a timer, and a scrap test shirt. Those three items let you protect the platen, hit the chart time, and verify the result.
A Teflon sheet is the tool you will use on almost every press. It stops ink and adhesive from sticking to the platen, and it guards the design when you re-press.
If you plan screen printing instead of vinyl, a starter kit can give you frames, squeegees, and film for your own designs.
Screen printing and heat pressing solve different problems. Screen printing lays ink through a mesh, while a heat press bonds a transfer with heat, time, and pressure.
Speedball says its fabric inks are permanent after heat setting and work on cotton, canvas, polyester, blends, linen, and rayon. That heat-setting step is separate from a vinyl press cycle, so read the ink instructions for its own settings.
How should you keep notes for future presses?
Keep notes in one place, sorted by material and fabric. A simple table with material, fabric, temperature, time, pressure, peel type, and result is enough.
Note the brand of vinyl or paper too. Two vinyl products can need different settings, even when the chart groups them under the same name.
Date each test, and note if you washed the garment first. Detergent residue, fabric softener, and moisture can all change how a transfer bonds.
Over time, your notes will be more useful than any general chart. You will know exactly what works on the blanks you buy again and again.
That is the real value of a heat press temperature chart. It gives you a safe starting point, and your tests turn that starting point into a repeatable process.
Frequently asked questions
What temperature should I use for heat transfer vinyl?
Most heat transfer vinyl charts list a starting range near 305 to 320 degrees F for about 10 to 15 seconds at medium pressure. The exact setting depends on the vinyl type and fabric, so always check the sheet that came with your vinyl and test a scrap piece first.
Why does my transfer peel off after pressing?
Peeling often means the temperature was too low, the press time was too short, or pressure was too light for that material. It can also mean moisture in the fabric, a dirty platen, or peeling at the wrong temperature.
Re-check your chart row and do a test press.
Can I use the same settings for sublimation and vinyl?
No. Sublimation usually needs higher heat and longer dwell than vinyl, and it needs polyester fabric or a polyester coating.
Vinyl needs enough heat to activate the adhesive, but too much heat can scorch light fabrics.