How to Heat Press a T-Shirt
To heat press a T-shirt, prepare the shirt, place the transfer, set the correct heat and time, press with steady pressure, then peel as directed. Let the garment cool before checking the finished design.
On this page (11 sections)
- What should you prepare before heat pressing a T-shirt?
- How do you prepare the shirt?
- How do you place a transfer on a T-shirt?
- How do you set the heat press?
- How do you press the T-shirt?
- How do you peel the transfer?
- How do you check the finished shirt?
- What other tools help with shirt projects?
- Which printer works for T-shirt transfers?
- How do you avoid common heat pressing mistakes?
- What is the simplest way to heat press a T-shirt?
To heat press a T-shirt, prepare the garment, position the transfer, set the recommended heat and time, press with even pressure, and peel at the correct temperature. The transfer instructions and shirt fabric determine the exact settings.
A clean setup prevents most avoidable problems. You need a flat work area, a suitable press, the shirt, the transfer, and any protective sheet or pressing pillow required by the transfer instructions.
If you are choosing equipment first, our guide to a heat press machine explains the main press types and the features that affect shirt projects.
What should you prepare before heat pressing a T-shirt?
Prepare a clean, dry shirt and a flat pressing surface before turning on the press. Remove lint, check the garment for wrinkles, and confirm that the transfer matches the shirt size and design area.
Read the transfer instructions from start to finish. For model-specific steps, see the HTVRONT heat press guide.
Look for the recommended temperature, pressing time, pressure, peel method, and any second pressing step.
Keep the shirt away from loose threads, dust, moisture, and fabric folds. A small wrinkle under the design can create an uneven result.
Use a heat-resistant work area with enough room to open the press fully. Keep cords clear of the pressing path and avoid touching the heated platen.
Which press suits a T-shirt project?
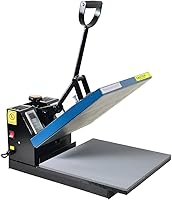
A press with a 15 x 15 in heat area gives you room for many front and back shirt designs. The Fancierstudio Digital Heat Press has a 15-by-15-inch press sheet, electronic time and heat control, adjustable pressure, and a silicon-gel base board.
Its heat range is 0 to 699°F, with a time range of 0 to 999 seconds. The product data also gives a 110-volt, 1,800-watt setup and an upward-opening design.
The press is a practical fit when you want a dedicated shirt workspace with room for larger designs. Measure your table and storage area first because the unit dimensions are 33 x 23 x 20 in.
How do you prepare the shirt?
Place the shirt flat and remove wrinkles before positioning the transfer. Smooth the front or back panel so the design area has consistent contact with the press.
Open the shirt and remove anything that could create a raised spot under the design. For frequent cap projects, compare automatic hat heat presses.
For curved cap projects, compare a top and bottom heat hat press designed for that shape. Check the collar, seams, pockets, buttons, and side folds.
Pre-press only if the garment or transfer instructions call for it. A short pre-press can help remove surface moisture and flatten the fabric, but extra heat can damage some materials.
Fold the shirt along the center line if you need to find the middle of the design area. For a front design, compare the placement with the collar and side seams before pressing.
How do you place a transfer on a T-shirt?
Place the transfer with its design facing the shirt and its carrier sheet positioned as instructed. Center the artwork, check the top and side spacing, and make sure no part of the transfer extends into a seam or fold.
For more detail on this material, read how to heat press vinyl on a shirt. Vinyl transfers can require a specific carrier position and peel temperature.
Use a ruler, folded paper guide, or the shirt's seams to help center the design. Avoid sliding the transfer after it touches the fabric because the artwork can shift or collect lint.
If the design has separate pieces, place each part carefully. Keep pieces from overlapping unless the transfer instructions allow it.
For larger graphics, check that the full design fits within the pressing area. If it does not, follow the transfer instructions for section pressing rather than letting the platen contact only part of the artwork.
How do you set the heat press?
Set the temperature and time from the transfer instructions, then adjust pressure so the shirt and transfer sit flat. Do not use one setting for every transfer type.
The correct setting depends on the transfer material and garment fabric. For a separate drinkware project, see whether a Cricut Mug Press can do tumblers.
Sublimation, vinyl, DTF, and other transfer methods can use different combinations of heat, time, and pressure.
A heat press temperature chart can help you organize common settings, but the transfer manufacturer's instructions take priority.
Wait for the press to reach the selected temperature before loading the shirt. Keep your hands away from the heated platen and use the handle when opening or closing the press.
Can screen printing ink be used with a heat press?
Screen printing ink is a different process from a ready-to-press transfer. Speedball Fabric Screen Printing Ink is a water-based, 6-color set with 4 fl oz of each black, white, red, yellow, blue, and green ink.
The ink works with cotton, polyester, blends, linen, rayon, other synthetic fibers, paper, and cardboard, but the product data excludes nylon. Speedball describes the ink as water soluble and intended to become permanent after heat setting.
Choose this set when you want to make a screen-printed design. It does not replace a transfer sheet or change the temperature and time instructions for a heat-transfer project.
Our heat press vs screen printing comparison explains the difference between pressing a prepared design and printing ink through a screen.
How do you press the T-shirt?
Lay the shirt and transfer on the press, close the platen, and apply the recommended pressure for the full time. Keep the garment and transfer still while the press is closed.
Check that the shirt is centered on the lower platen. Pull the rest of the garment away from the pressing area so extra fabric does not fold under the design.
Close the press smoothly and start the timer. Do not lift the press repeatedly to check the design because that changes the contact time.
When the timer ends, open the press using the handle. Keep your fingers away from the heated platen and transfer area.
Some transfers need a second press after the carrier sheet is removed. Follow the transfer instructions and use a protective sheet when required.
How do you peel the transfer?
Peel the carrier sheet at the temperature specified by the transfer instructions. Hot, warm, and cold peels are not interchangeable.
Start at one corner and pull the carrier back slowly. Watch the design as you peel.
If part of the artwork lifts, lower the carrier sheet and follow the instructions for another press.
Do not stretch the shirt while peeling. Keep the fabric supported and flat so the design stays in its intended position.
For DTF work, see how to heat press DTF and compare equipment in the best heat presses for DTF transfers.
How do you check the finished shirt?
Inspect the edges, corners, and small design details after peeling. The design should lie flat and remain attached without obvious lifting.
Let the shirt cool before folding it. Check for wrinkles, missed areas, scorch marks, or sections that did not receive even pressure.
If a corner lifts, do not keep pulling. Cover the design as directed and press again using the same transfer instructions.
Wash the shirt only according to the transfer and garment care instructions. Avoid assuming that every pressed design has the same washing method.
What other tools help with shirt projects?
A screen printing starter kit can help if you want to create designs with mesh frames rather than use ready-made transfers. The Caydo 23 Pieces Screen Printing Starter Kit includes 10 x 14 in, 8 x 12 in, and 6 x 10 in wood frames with mesh.
The kit also includes 5 A4 inkjet transparency films, 10 wood mixing sticks, 2 plastic scrapers, masking tape, a glove, and instructions. Its frame sizes suit different artwork areas, while the 9.4 in and 5.9 in squeegees give you larger and smaller options.
Choose it when you want a screen-printing workflow for T-shirts, canvas tote bags, or tank tops. Choose a heat press and transfer when you already have the artwork prepared and want to apply it directly.
For a shirt-focused press shortlist, see the best heat press for T-shirts. If you also press sweatshirts, compare the best heat presses for shirts and hoodies.
Which printer works for T-shirt transfers?
Your printer depends on the transfer method. A sublimation printer is used for sublimation workflows, while an inkjet printer can be used with compatible inkjet transfer paper.
Compare the best sublimation printer for T-shirts if you want to create sublimation designs. For printable transfer paper, see the best inkjet printer for T-shirt transfers.
Do not assume that a printer, paper, ink, shirt, and press work together without checking their instructions. Compatibility depends on the transfer system and the garment material.
How do you avoid common heat pressing mistakes?
Most heat pressing mistakes come from wrong settings, uneven placement, wrinkles, or peeling at the wrong time. Check each part of the process before closing the press.
Avoid these problems:
- Do not guess the temperature when the transfer instructions provide one.
- Do not press over seams, buttons, zippers, or folds.
- Do not move the transfer after placement.
- Do not open the press before the full time ends.
- Do not peel until the transfer instructions allow it.
- Do not wash the shirt before checking the care instructions.
If you are pressing a sports shirt, follow the same preparation steps but check the garment's seams and material carefully. Our guide to how to heat press on a jersey covers jersey-specific placement concerns.
For small fabric designs, compare the best heat presses for patches before choosing a large shirt press.
What is the simplest way to heat press a T-shirt?
The simplest method is to use a compatible transfer, follow its exact temperature and time settings, keep the shirt flat, and peel at the instructed temperature. Preparation matters as much as the press itself.
Choose the Fancierstudio if you want a 15 x 15 in digital press with adjustable pressure and electronic controls. Choose the Speedball set for screen-printing ink in 6 colors, or the Caydo kit when you need frames and basic screen-printing supplies.
Start with one shirt and a simple design area. Once the placement, pressure, and peel process are consistent, move on to larger graphics, hoodies, jerseys, or more complex transfer materials.
Frequently asked questions
What temperature should you use to heat press a T-shirt?
Use the temperature recommended for your specific transfer and shirt fabric. Transfer instructions take priority because vinyl, sublimation, and other materials can need different heat settings.
Set the press before loading the shirt, then confirm the garment is flat and protected from direct contact with the platen where required.
How long do you press a T-shirt?
Use the time recommended by the transfer manufacturer rather than choosing one setting for every shirt. The correct time depends on the transfer material, fabric, temperature, and pressure.
Start with a smooth, wrinkle-free garment, keep the press closed for the full setting, and peel according to the transfer instructions.
Can you heat press every type of T-shirt?
No. Check the transfer and garment care instructions before pressing.
Cotton, polyester, blends, and specialty fabrics can react differently to heat.
If the material is unfamiliar, check its heat limits and use a test garment when possible before pressing the shirt you want to keep.
Should you peel a shirt transfer hot or cold?
Follow the transfer instructions because some designs need a hot peel, warm peel, or cold peel. Peeling at the wrong temperature can lift the design or leave part of it attached to the carrier sheet.
Lift one corner carefully instead of pulling the whole sheet quickly.